Commercial Induction Griddle: Complete Buying Guide
06/23/2026
Estimated reading time: 2 minutes
IN THIS ARTICLE
- What Is a Commercial Induction Griddle? How Does It Differ from Gas and Electric Griddles?
- How to Choose a Commercial Induction Griddle: Types, Specs & Comparison
- How Commercial Induction Griddles Are Used Across Different Foodservice Segments
- Installation Requirements and Pre-Setup Preparation for Commercial Induction Griddles
- Daily Maintenance and Common Troubleshooting for Commercial Induction Griddles
- Frequently Asked Questions About Commercial Induction Griddles
What Is a Commercial Induction Griddle? How Does It Differ from Gas and Electric Griddles?
How a Commercial Electromagnetic Griddle Heats: The Working Principle
The fundamental difference between a commercial induction griddle and a gas or electric griddle comes down to one thing — who is actually generating the heat. Get this right, and every performance gap below clicks into place.
Here is the core logic behind how an electric induction griddle heats:
1. The electromagnetic coil creates a high-frequency alternating magnetic field.
Once powered on, the built-in coil produces an alternating magnetic field at 20–40 kHz. The field itself doesn’t generate heat. Its job is to pass through the ceramic glass panel and reach the ferrous griddle plate above.
2. The field induces eddy currents inside the plate — the plate becomes its own heat source.
Magnetic flux lines cut through the iron molecules in the plate, creating eddy currents. Those currents make the iron molecules vibrate at high speed, and heat is born directly inside the metal. No flame heating from below. No resistance wire glowing red first and slowly transferring warmth. The plate itself is what’s hot.
3. “Zero-intermediary” direct heating gives you three results you’ll notice right away.
No middleman in the heat chain means energy conversion hits 90%–95% (industry test data). That principle leads to three things. First, extremely fast warm-up — cold start to working temperature in 60–90 seconds. Second, completely flameless operation with zero exhaust, so fire and gas-leak hazards are gone at the source. Third, a noticeably cooler kitchen, because almost no waste heat escapes into the air.
During ATRX product training sessions with overseas buyers, we sum it up in one line: “An induction griddle doesn’t ‘burn’ the plate — it makes the plate ‘run a fever’ on its own.” Visitors to our factory have touched the side panel of a unit running at full power — cool to the touch. Only the plate is hot.
That’s the moment it clicks. Hitting 95% thermal efficiency isn’t about raw heating power. It’s about heat staying exactly where it should. That is the essence of electromagnetic induction direct heating — and it makes the comparison data below a lot easier to read.
Induction Griddle vs Gas Griddle — and Electric: Core Differences
Principle covered. Now the question every procurement decision-maker actually cares about: where does an induction flat top griddle outperform gas and electric, and by how much? That’s the heart of any induction griddle vs gas griddle evaluation.
The table below draws on testing standards from the U.S. FSTC (Food Service Technology Center) and the ENERGY STAR commercial griddle program, combined with real equipment test results. It covers six dimensions that carry the most weight in B2B procurement:
| Comparison Dimension | Induction Griddle | Gas Griddle | Electric Griddle |
|---|---|---|---|
| Thermal Efficiency | 90%–95% | 40%–50% | 50%–65% |
| Preheat Time | 60–90 seconds | 7–20 minutes | 5–10 minutes |
| Temperature Control Precision | ±0.1°C–1°C, stepless adjustment | ±5°C–10°C, affected by flame fluctuation | ±3°C–5°C, dependent on thermostat accuracy |
| Energy Cost | ~50% lower operating cost vs. gas | High fuel cost; standing pilot light causes continuous idle loss | Between the two; idle consumption can account for 40% of total energy use |
| Safety (Open Flame / Exhaust) | No open flame, no gas leaks, no CO emissions | Open flame; risk of gas leaks and carbon monoxide poisoning | No open flame, but long-term high-temperature aging of resistance elements poses risks |
| Ventilation Requirements | Minimal grease smoke; lower ventilation needs; reduced exhaust system investment | Combustion produces heavy exhaust and waste heat; high-spec exhaust system mandatory | No combustion exhaust, but significant radiant heat still needs adequate ventilation |
The number to lock onto here is thermal efficiency. 95% vs. 40%–50% — that’s not a small gap. Put it this way: every cubic meter of natural gas a gas griddle burns, more than half the heat turns into exhaust and radiant heat that drifts into your kitchen air. You pay for that wasted fuel first. Then you pay again — the electricity bill to air-condition all that waste heat right back out.
The U.S. Department of Energy’s Federal Energy Management Program (FEMP) puts it plainly in its commercial griddle purchasing guide: idle energy consumption can eat up to 40% of a griddle’s total energy use. With an induction unit, turning off a heating zone drops consumption to near zero instantly. No “ghost bill” from a standing pilot light. We first spotted this data point when researching the U.S. DOE commercial griddle purchasing guide.
How to Choose a Commercial Induction Griddle: Types, Specs & Comparison
A lot of buyers jump straight to “Which brand is best?” That question comes too early. Any solid commercial griddle buying guide starts here: how many types exist, and which specs match your kitchen layout and daily output? Nail the type and parameters first. Brand becomes the easy last step. This section covers both — product categories first, then the spec range you should target.
Common Types and Classification of Commercial Induction Griddles
Commercial induction griddles aren’t one-size-fits-all. Installation method, plate surface texture, and plate material — combine these three and the use case changes completely. We’ve seen three stores under the same Southeast Asian casual-dining brand each buying a different form factor — countertop, built-in, and freestanding — because each location had different space constraints and peak throughput. Not a mistake. A lesson: sort out the type first, then talk numbers.
1. By Installation Method
Countertop: Set it on a prep table and go. No structural changes. Compact, typically around 3.5 kW. Small restaurants, breakfast counters, food trucks, temporary overflow stations — anywhere space is tight.
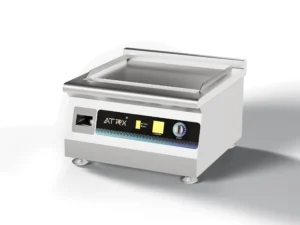
Built-in (Drop-in): The countertop is pre-cut and the unit sits flush with the surface. Fewer gaps, easier cleaning, cleaner look. Buffet lines, open kitchens, hotel griddle stations, or any mid-to-high-end spot with design standards — a drop-in induction griddle is the go-to choice.

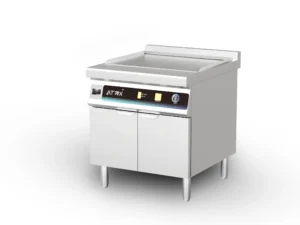
Freestanding: Comes with its own cabinet or legs. Stands on the floor independently, no counter needed. Power starts at 5 kW and up. The base can double as storage or house an oven module. Central kitchens, QSR back-of-house, institutional cafeterias — high-volume, fast-paced environments lean on these.
2. By Griddle Plate Surface Texture
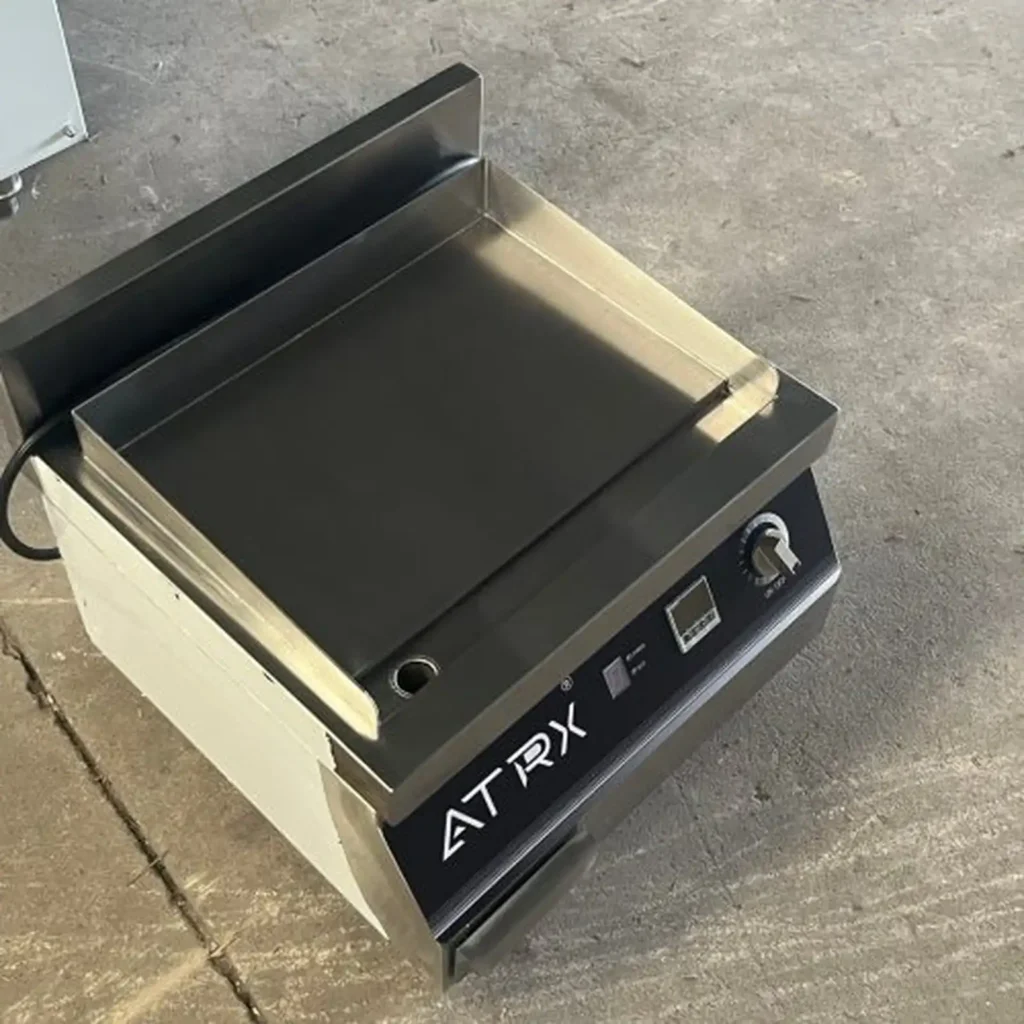
Flat / Smooth plate: Fully flat surface. High food contact, even heat, minimal sticking. Great for eggs, pancakes, dumplings, sautéed vegetables, flatbreads. In breakfast shops and QSR kitchens, the induction flat top griddle with a smooth surface is the most common setup.
Grooved / Ribbed plate: Raised ridges press clear grill marks into steaks, chicken, and burger patties. Grooves channel excess grease away, giving a finish close to charcoal-grilled. Steakhouses, Western restaurants, grill-forward menus — grooved is the default.
Half Flat / Half Grooved combination plate: One plate, two surfaces. Fry eggs on the left, grill meat on the right. One machine, two jobs. If your menu is varied but there’s only room for one griddle, this is the practical middle ground.
3. By Griddle Plate Material
Cast iron: Outstanding heat retention and high thermal inertia. Drop a batch of frozen patties on it and the temperature barely dips. Peak-hour mass grilling of burgers and steaks? Cast iron holds the line. Trade-off: it’s heavy, and needs regular oiling to prevent rust.
Stainless steel composite (typically 304 food-grade): Heats fast, resists corrosion, wipes clean, no special upkeep. Buffet counters, hotel stations, chain kitchens — anywhere demanding speed and strict hygiene. Lower maintenance across the board.
Neither material is universally better. It depends on your core menu items and whether your team has bandwidth for routine plate care.
Key Specifications to Focus on When Selecting a Model
Type settled? Next step: match your kitchen conditions and business needs against specs, one by one. The five parameters below all need checking before you buy. This isn’t just advice — it’s a pattern we see repeatedly. ATRX production-line shipment data shows roughly 70% of after-sales issues trace back to specs being overlooked at the purchasing stage. “Voltage/phase mismatch with the actual circuit” alone accounts for nearly half of all installation complaints.
1. Power Rating — The Ceiling on Your Output
Three mainstream tiers: 3.5 kW, 5 kW, and 8 kW. At 3.5 kW, you’ve got enough for one operator in a small counter or café doing 50–100 servings a day. The 5 kW range is the best seller — mid-sized restaurants and QSR kitchens turning out 100–200 servings daily usually land here.
At 8 kW and up, you’re in central-kitchen and hotel-banquet territory: 200+ servings a day. Higher power means faster heat-up and faster recovery when cold ingredients hit the plate — but your circuit capacity and ventilation have to keep up. Don’t chase wattage without checking the infrastructure.
2. Voltage and Phase — This Decides Whether You Can Install It at All
Under 3.5 kW, 220V single-phase is usually enough. A standard commercial outlet will do — simplest install possible. At 5 kW, watch carefully: some models run on 220V single-phase, others need 380V three-phase. Confirm with the manufacturer before ordering.
8 kW and above? Nearly all require 380V three-phase. No three-phase supply on-site means the unit won’t start, period. Contact your power utility early to arrange a capacity upgrade — factor both timeline and cost into your budget.
3. Plate Size and Thickness — The Physical Limit on Capacity and Quality
Area determines how much goes on at once. About 400 mm × 400 mm handles one operator at one station. At 800 mm × 600 mm and up, multiple people can work side by side or batch-cook without crowding.
Thickness matters just as much. Commercial plates run 8–12 mm. Thicker stores more heat, distributes it more evenly, drops less when cold food lands, and recovers faster. Thin plates (under 6 mm) may seem quicker to heat, but during peak rushes you’ll see uneven hot spots, sudden temperature dips, and warping over time. For high-volume operations, 10 mm and above is a safe starting point.
4. Temperature Control — This Largely Decides Output Consistency
Three approaches, each meaningfully different. Knob-type: manual rotation, typically 8 levels. Experienced chefs handle it by feel. Digital display: real-time power and temperature readout, precise target setting, variance within ±5°F. Common in chain restaurants and hotel griddle stations.
Programmable: pre-save temperature curves and cook times per menu item, recall with one tap during service. No reliance on experience, no disruption when staff rotate. Especially useful in QSR and institutional kitchens. Cost climbs from knob to digital to programmable. Pick based on your team’s skill level and how standardized the menu needs to be.
The table below puts four key parameters next to typical scenarios so you can match your own situation fast:
| Parameter | Specification Options | Typical Application Scenario | Selection Advice |
|---|---|---|---|
| Power Rating | 3.5 kW | Small counters, cafés, food trucks (≤100 servings/day) | Best when power and space are limited; single-operator use |
| 5 kW | Mid-sized restaurants, QSR kitchens (100–200 servings/day) | Best-value mainstream tier; widest scenario fit | |
| 8 kW+ | Central kitchens, hotel banquets, cafeterias (200+ servings/day) | Confirm 380V three-phase power and adequate cooling clearance | |
| Voltage & Phase | 220V / Single-phase | Small outlets with standard commercial sockets | Easiest install; matches 3.5 kW and some 5 kW models |
| 380V / Three-phase | Mid-to-large kitchens with three-phase access | Mandatory for 5 kW+; arrange upgrade if unavailable | |
| Plate Size | ≈400×400 mm | Single-person, single-station operation | Counters and small shops |
| ≥800×600 mm | Multi-person or batch cooking | High-volume peak-hour kitchens | |
| Plate Thickness | 8–10 mm | Moderate daily volume | Baseline for heat uniformity and durability |
| 10–12 mm | Peak continuous service, batch grilling | Noticeably better temp stability and warp resistance | |
| Temperature Control | Knob | Traditional kitchens led by experienced chefs | Lowest cost; relies on operator skill |
| Digital Display | Chain restaurants, hotel griddle stations | High precision, consistent output, moderate cost |
How Commercial Induction Griddles Are Used Across Different Foodservice Segments
Put the same induction griddle in a Western restaurant and in a school cafeteria — totally different playbook. The restaurant wants temperature precision. The cafeteria wants batch throughput. An induction teppanyaki griddle thrives on being smoke-free and flame-free. A central kitchen cares most about safety compliance.
Same equipment category, different priorities. Figuring out what your segment actually needs from this piece of commercial kitchen induction equipment matters more than obsessing over specs. Two broad scenario groups below, each broken down by how the griddle gets used.
Applications in Western Restaurants, Teppanyaki, and Hotel Buffet Stations
These three look different on the surface. Underneath, their core demand on an induction griddle is the same: precise temperature control in a clean environment.
Western Restaurants: Dual-zone control — one unit handles the full searing workflow.
The biggest value of an induction griddle for restaurant kitchens is one word: precision. Chefs split the plate into two zones. One side runs at 220°C–230°C for high-heat searing to lock in juices. The other holds around 150°C for low-temp finishing or holding until service. A steak goes from raw to plated without ever leaving the griddle, temperature deviation within ±1°C.
Medium-rare or well-done? Not a guess anymore — it’s set by zone temperature. One Shenzhen-based fine-dining kitchen reported that steak return rates dropped from nearly 8% to under 2% after switching to induction. The reason: doneness became something you could measure, not just feel.
Teppanyaki: No open flame means you can bring the kitchen right to the guest’s table.
Teppanyaki is built on theater. The chef performs inches from diners — flipping, seasoning, plating in one flow. But traditional gas teppanyaki stations push radiant heat, grease smoke, and noise right into the guest’s face. Not ideal when seats are barely a meter away.
An induction teppanyaki griddle heats via electromagnetic induction. No flame, minimal smoke, and the ambient temperature around the plate runs roughly 5°C lower than gas. Guests see everything. They smell nothing unpleasant. The showmanship stays; the discomfort goes.
Hotel Breakfast Buffet: Fast heat-up, steady temperature, no drop-offs through the rush.
Breakfast stations face a compressed pressure window — peak lasts one to two hours, and fried eggs, bacon, sausage, and pancakes have to come out wave after wave. If the equipment falls one step behind, a gap opens on the buffet line and guest satisfaction dips.
A commercial induction flat top grill goes from cold to working temperature in 90 seconds. More importantly, it keeps fluctuations tight across the entire breakfast period. The first fried egg and the hundredth come out at the same quality. No flame, low radiant heat — drop it right into a buffet counter for live cooking in front of guests. Efficiency and interaction, both maxed out.
Applications in QSR Chains, Institutional Cafeterias, and Central Kitchens
The three scenarios above chase “precision” and “polish.” The next three chase “speed” and “consistency.” QSR chains, institutional cafeterias, and central kitchens share two baseline needs: high volume and high standardization. Here, the griddle isn’t a cooking tool — it’s a quantifiable production unit.
For QSR chains, the goal boils down to standardized replication. Take paninis and burger patties: headquarters sets the parameters — 200°C for 90 seconds, flip, 60 seconds more — and store staff execute. The digital panel stores presets. Some models support full recipe programming. The temperature curve and cook time for a patty are identical in Beijing and Chengdu. People change. The flavor doesn’t. For any chain system, that’s the ultimate certainty.
Institutional cafeterias care about two things: how much fits on the plate at once, and how the numbers look at month-end. A single industrial induction griddle with a 900 mm wide plate handles roughly 20 patties or dozens of eggs simultaneously. Paired with fast heat-up and stable output, daily volumes of several hundred to over a thousand servings are well within reach.
Energy costs tell an even clearer story. In a 30-day parallel test our engineering team ran alongside a South China university cafeteria — same kitchen, same menu, same operators — the induction griddle’s monthly energy bill came in approximately 42% lower than the gas unit’s. That dataset went straight into the university’s official equipment procurement report. The higher the volume, the bigger the gap.
Central kitchens run on different logic entirely. The top concern isn’t speed — it’s compliance. Under China’s General Hygienic Standard for Food Production (GB 14881), processing workshops have strict limits on fire and heat sources. A commercial electromagnetic griddle has no flame and no gas-leak risk, so it clears fire-safety and air-quality requirements by design.
Its programmable controls let you set individual heating curves and times for each product. The entire cook process is parameterized. Batch-to-batch deviation stays minimal. In facilities that need large-scale output, full traceability, and strict safety compliance, induction griddles have gone from “worth a look” to standard equipment.
The table below compares how these three segments use induction griddles differently, so you can quickly see which capabilities matter most for your operation:
| Comparison Dimension | QSR Chains | Institutional Cafeterias | Central Kitchens |
|---|---|---|---|
| Core Demand | Standardized output across locations | High-volume batch cooking | Safety compliance + parameterized production |
| Key Feature Dependency | Programmable presets, digital temp panel | Large-format wide plate, sustained temp control | Flameless design, programmable heating curves |
| Typical Products | Paninis, burger patties | Fried eggs, pan-fried dumplings, meat patties | Pre-prepared pan-seared semi-finished items |
| Daily Usage Intensity | Medium-high (time-segmented peaks) | High (concentrated dense output) | High (continuous long-duration runs) |
| Selection Priority | Temp precision + parameter storage | Plate area + energy efficiency ratio | Safety certifications + programmable control |
Installation Requirements and Pre-Setup Preparation for Commercial Induction Griddles
Picked the right equipment but can’t install it? That’s worse than picking wrong. A commercial induction griddle isn’t like a gas unit where you hook up a line, light the flame, and go. It has hard requirements for electrical systems and physical space. Miss any one ahead of time and your opening schedule stalls.
Wrong circuit means rewiring. No clearance means rework. Failed ventilation inspection means remediation. Every one of those costs time and money. The smart move: run through an installation checklist before you order, not after the equipment shows up. Two areas to cover — electrical first, then space and ventilation.
Electrical Configuration: Voltage, Amperage, and Circuit Compatibility
Can it actually be installed? The first gate is electrical. Your kitchen’s existing power system either handles the load or it doesn’t — and you need to know before you pay. Industry-wide, roughly three in ten first-time overseas buyers skip the voltage and capacity check. Equipment reaches port, and then they discover rewiring is needed. One to two weeks wasted. Entirely avoidable.
Go through these items one by one:
Confirm voltage standard vs. power rating.
Simple dividing line: under 5 kW, 220V single-phase is usually fine. Common in small counters and secondary stations. Above 5 kW, you need 380V three-phase — that’s the standard for mid-to-large commercial kitchen induction equipment. Check what your site has now. If it’s single-phase only, contact your property manager or utility company early. In some areas, the approval process alone takes weeks.
Calculate amperage and breaker sizing with headroom.
An 8 kW / 380V three-phase unit draws about 13A. Breaker rule of thumb: rated current × 1.25. That means at least 16A. No margin? Full-load trips.
Easy to miss: if other high-draw equipment shares the circuit, add all currents together. If the total is too high, pull a dedicated line for the griddle. That’s the cleanest fix.
Match cable gauge to rated current.
Undersized cable doesn’t just waste energy — it overheats. Copper cross-section must match the rated amps on the nameplate. Cross-reference your local electrical code’s ampacity table. Easiest approach: send nameplate specs to your electrician at purchase time. Let a pro assess the full run from panel to install point. When the unit arrives, plug in and go.
Ventilation and Space Layout: Pre-Installation Planning
No flame doesn’t mean no exhaust needed. That’s the most common misconception about induction griddles. True — no combustion exhaust. But the second food hits a hot plate, grease smoke, steam, and odor go straight up. Without proper ventilation, your first health inspection is the one that fails.
One chain restaurant overseas learned this the hard way. They assumed no flame meant no hood. Health inspectors required full remediation. Opening pushed back three weeks. That kind of delay only needs to happen once.
The upside: induction equipment genuinely needs less exhaust infrastructure than gas. No combustion byproducts means many jurisdictions allow a Type II hood — handling grease and steam only — with airflow 30%–50% lower than an equivalent gas station. Lower build-out cost, lower running cost.
But check your local rules first. Some areas mandate Type I for all commercial cooking equipment, no exceptions.
Beyond ventilation, measure the physical space before the unit ships. Blocked heat vents trigger thermal shutdowns. A counter that can’t hold the weight is a hazard. A doorway too narrow means the machine doesn’t even make it into the kitchen. Solve all of this during renovation, not on delivery day.
The table below consolidates every space and ventilation item to check before install — save it and go line by line:
| Inspection Item | Requirement | Notes |
|---|---|---|
| Exhaust Hood Type | Induction equipment typically qualifies for Type II | Verify local code first; some areas still require Type I |
| Airflow Volume | 30%–50% lower than equivalent gas setup | Use local ventilation code as benchmark; consult HVAC engineer if unsure |
| Wall Clearance | Minimum 5–10 cm; per manual | Rear and side vents must stay unblocked |
| Hood-to-Equipment Distance | Per local fire code min/max | Too far = weak extraction; too close = may not fit |
| Countertop Load Capacity | Must handle full unit weight (can be tens of kg with plate) | Built-in installs: confirm cutout size and structural strength |
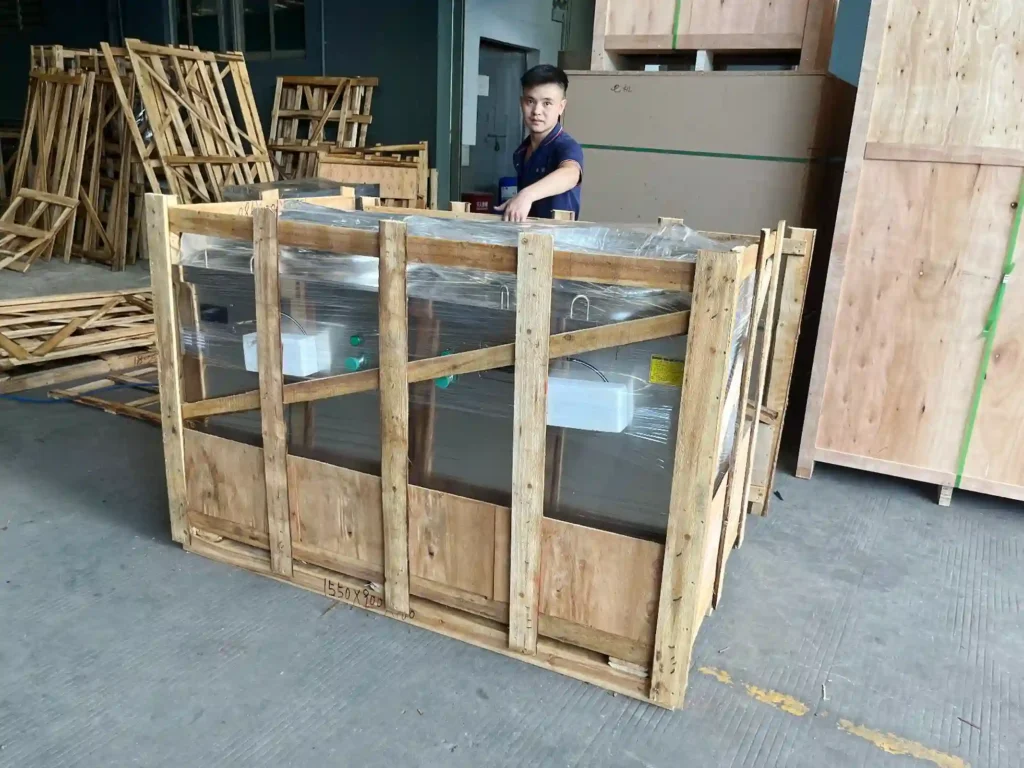
| Delivery Pathway | Measure corridors, doorframes, freight elevators | Measure by outer packaging, not bare machine |
Daily Maintenance and Common Troubleshooting for Commercial Induction Griddles
Compared to open-flame griddles, a commercial induction flat top grill is structurally much simpler. No gas lines, no burner assemblies, far fewer parts to manage. But simpler doesn’t mean zero upkeep. A consistent cleaning and care routine determines how long the unit runs reliably and how many years the plate lasts.
Just as important: reading fault codes and knowing basic diagnostics lets a kitchen manager make fast calls during a rush — reset and keep going, or shut down and call for help right away.
Daily Cleaning Routine and Periodic Maintenance
Day-to-day cleaning of an induction flat top griddle is easier than most people expect. Full routine, once you’re practiced: five to eight minutes. Three tiers, by frequency:
After every shift:
Don’t wait for the plate to cool completely. Start when surface temperature drops to around 60°C. Pour a small amount of ice water — the thermal shock loosens stuck grease and food debris immediately. Then take a stainless steel scraper at roughly a 30° angle and push residue in one direction into the grease trough.
Wipe down the full plate with a damp microfiber cloth. Last step — easy to skip, but it matters: apply a thin coat of food-grade mineral oil. This film blocks air, prevents oxidation and rust, and keeps the plate ready for tomorrow.
Once a week (on a closed day or during a slow window):
Two focus areas. First, the grease trough. Pull it out, wash it thoroughly, dry it, put it back. Don’t let old grease build up — it’s a hygiene risk and a smell problem. Second, the air-intake filter on the bottom or rear of the unit. Brush or blast it with compressed air to clear dust and grease particles. This keeps the cooling path open.
A clogged filter is the single most common trigger for overheat alarms. In ATRX user manuals, both maintenance points are marked with diagrams — staff can find them by picture alone, no language barrier.
Plate seasoning (once for a new unit, or after deep resurfacing):
Heat the plate to medium. Spread a thin, even layer of cooking oil. Hold at temperature for 15–20 minutes so the oil seeps into the surface’s micro-pores and forms a natural non-stick layer. Turn off heat. Cool naturally. Wipe off excess with a microfiber cloth. Done.
Skip this step and the first couple days of service will be frustrating — eggs stick, crepes tear. Do it once and the problem disappears. We’ve seen kitchen teams go back and season after-the-fact; the non-stick kicks in right away once they do.
Maintenance summed up: five minutes of quick clean after every shift, one deep check per week, one seasoning for new equipment. Print the steps on a card, stick it next to the machine. Standard holds no matter who’s working.
Common Fault Codes and Basic Troubleshooting
An error code mid-service, or heating that suddenly goes off — it’ll happen at some point. Kitchen managers don’t need to know circuit repair. They need to know what the machine is telling them: which codes mean “reset and move on,” and which mean “stop and call someone.” The table below covers the most common ones:
| Symptom | Code | Likely Cause | Self-Check & Action | Call Service? |
|---|---|---|---|---|
| No heating / heating stops | E1 | Plate not seated properly; no-pan detection triggered | Check if plate shifted or lifted; reseat and restart | Not if it resumes after reset |
| No heating / heating stops | E2 | Plate or internal temp too high; over-temp protection kicked in | Power off, cool naturally 10–15 min, restart | Once in a while is fine; keeps happening = call in |
| No heating / heating stops | E3 | IGBT module overheating — usually a cooling issue | Shut down now; check if intake filter is clogged; clean and restart | Still showing E3 after cleaning? Yes, call service |
| Uneven heating | Usually none | Plate warped over time; or one coil group partially failed | Cold unit — lay a straight edge across the plate to check flatness | Clear warping = replace plate; coil issue = service call |
| Fan noise | Usually none | Filter clogged (high air resistance); or bearing/blade wear | Clean filter first; listen again | Still noisy after cleaning = fan assembly swap needed |
In real use, E1 and E2 come up the most — and they’re almost always operator-level issues, not hardware failure. Follow the table, reset, and service resumes in minutes. Based on two years of factory after-sales data, over 70% of incoming service calls are resolved remotely just by walking the user through the self-check. Actual hardware faults needing an on-site tech? Under 30%.
Decision logic is straightforward. E1, E2 — self-check and reset. E3 keeps popping, uneven heat with no clear cause, fan noisy after filter cleaning — shut down, call for help. What you can fix, fix now. What you can’t, escalate immediately. Don’t sit on it. Build that response habit and equipment downtime barely touches your service hours.
Frequently Asked Questions About Commercial Induction Griddles
Two worries come up almost universally: “Am I about to overpay or buy wrong?” before purchase, and “Is this actually saving me money?” after. The questions sound varied, but they really split into two buckets — pre-purchase concerns about safety and cost, and post-purchase questions about daily use and long-term ownership. Here are the most common ones, answered straight.
Common Questions Before Purchase
Is electromagnetic radiation from a commercial induction griddle harmful?
Short answer: the exposure is negligible — far below what your smartphone produces. During operation, the magnetic field stays concentrated beneath the plate in a closed loop. Nearly all the energy goes into heating food. What leaks externally is tiny. Measured levels run about one-sixtieth of a mobile phone’s output, well within the ICNIRP safety guidelines and China’s national standard GB 8702-2014.
In independent spot-checks we’ve witnessed at ATRX factory audits, handheld EMF meters at normal operating distance (about 40 cm) consistently read below one-tenth of a phone in active call. That number tends to settle the concern on the spot.
Does it need special cookware?
No. Unlike a regular induction cooktop, the griddle plate itself is the cooking surface. Food goes directly on it — no pans required. Just confirm at purchase that the plate is ferromagnetic: cast iron or 430-series magnetic stainless steel. Only ferromagnetic material works efficiently with induction heating.
Quickest test: put a magnet on it. Sticks? You’re good.
What does a commercial induction griddle typically cost?
Depends on power and features. Entry-level 3.5 kW countertop units start around $300–$700 — plenty for a small counter or light-fare shop. Mid-range 5–8 kW freestanding models run $700–$2,000, the workhorse tier for most restaurant kitchens. High-power 10 kW+ premium models start at roughly $2,000 and can exceed $4,000 for top-end configurations — mostly serving hotel central kitchens and large institutional operations.
Can it be customized to fit specific kitchen dimensions?
Yes. Most professional manufacturers support non-standard sizing — plate area, body footprint, built-in depth. Whether you need a drop-in induction griddle for a buffet line or an oversized freestanding unit for a production run, send your floor plan or on-site measurements with the quote request. Faster turnaround, more accurate proposal.
What certifications should I look for?
For export: CE (EU) and CB (international mutual recognition). Domestic China: CCC or CQC. Quality-focused brands also carry NSF food safety certification and ISO system certification. These aren’t decorative — they’re hard proof of safety and build quality. Don’t accept verbal claims. Ask for certificate originals or verifiable numbers before you commit.
Common Questions During Use
Once the unit is running, the questions shift from “should I buy” to “does it work” and “is it saving money.” These four cover over 90% of the service inquiries we see.
Is switching from gas to induction a big adjustment?
There’s a difference, but the curve is short. The core change is temperature control. Gas means adjusting flame by eye and experience. Induction means setting a number on a digital panel and the machine holds it — fluctuation typically within ±5°F. Most chefs without induction experience adapt fully in one to two days. Common feedback: it’s actually less work than gas, because you stop babysitting the flame.
Does the plate need replacement over time?
Depends on material and care. Quality 304 stainless steel or cast iron, used 6–8 hours a day at commercial intensity, lasts 5–7 years. Well-maintained cast iron can go past 10. Time to swap: visible permanent warping, or surface wear bad enough to affect heating uniformity.
To extend life: don’t dry-fire, clean residue promptly after each shift, and oil cast iron plates regularly. Small habits, real payoff.
Is the monthly electricity bill higher or lower than gas?
Lower. Significantly. Induction thermal efficiency exceeds 90%. Gas sits at 40%–60% — flames shed massive heat into the air that never reaches the food. Our engineering team ran a controlled 30-day side-by-side test. Same kitchen, same dishes, same operator. Here’s what the numbers looked like:
| Item | Induction Griddle (15 kW) | Gas Griddle (Equivalent Output) |
|---|---|---|
| Thermal Efficiency | ≥90% | 40%–60% |
| Hourly Energy Cost | ≈$1.50 | ≈$4.30 |
| Daily (6 hrs) | ≈$9 | ≈$26 |
| Monthly (26 working days) | ≈$235 | ≈$676 |
| Monthly Savings | — | Induction saves ≈$440/month |
| Savings % | — | ≈65% |
Note: gas-side figures are based on LPG pricing. If your site uses piped natural gas, fuel cost will be lower — but the overall induction advantage still holds. Real-world gas-to-electric switchovers across cafeterias and restaurants consistently show monthly energy spend dropping 20%–50%.
How long is the standard warranty, and what does it cover?
Industry norm is 1–2 years. Some quality-oriented brands offer 3–5 year extended coverage. Warranty typically includes the core functional parts: electromagnetic coil, main control board, temperature sensors, power module, and cooling fan.
What’s usually excluded: normal plate surface wear, glass panel cracked by impact, and faults from using non-ferromagnetic vessels or improper operation. Bottom line — read the warranty terms line by line before buying. Keep your purchase receipt and installation records. If a claim comes up, those are your proof.
About the author
ATRX Team| 18 Years Commercial
Induction Cooker Manufacturer in China
Induction Cooker Manufacturer in China
Related Posts
Commercial Induction Griddle: Complete Buying Guide
06/23/2026
How Commercial Induction Cookers Are Delivered On Time and In Full | ATRX
06/22/2026
How ATRX Handles OEM Commercial Induction Cooker Custom Orders
06/21/2026

How ATRX Built Its Commercial Induction Cooker Production Line
06/19/2026
How to Find a Reliable Commercial Induction Cooker Factory in China
06/17/2026
Commercial Induction Cooker Quality Control — How ATRX Does It
06/16/2026
How ATRX Mass-Produces 3–40kW Commercial Induction Cookers
06/15/2026
Can Aluminum Containers Be Used on Induction Cooktops?
06/14/2026
How Commercial Induction Cookers Are Made — ATRX Full Manufacturing Process
06/13/2026
Is Induction Cooktop Radiation Dangerous to Your Health?
06/12/2026