

How to Clean a Commercial Deep Fryer: A Step-by-Step Guide
09/13/2026
Estimated reading time: 2 minutes

Commercial deep fryers are exposed to hot cooking oil, food particles, and grease every day. Without proper cleaning, residue continues to build up in the fry pot, around the heating components, and near the drain area. This can affect the color and flavor of fried food while increasing the risk of smoke, odors, poor oil drainage, and equipment failure.A reliable cleaning process generally includes shutting down and cooling the fryer, draining or filtering the oil, cleaning the fry pot, washing removable components, rinsing and drying thoroughly, and scheduling a deep boil-out according to usage levels. Always consult the equipment manual before starting, as shutdown and oil-draining procedures may differ among gas, electric, pressure, and built-in filtration fryers.
This guide is intended for commercial kitchens worldwide, but all procedures must still comply with local safety requirements and the equipment manual. For example, commercial induction fryer manufacturer ATRX’s commercial induction fryer range includes countertop and floor-standing models, single- and twin-tank configurations, and capacities from 8L to 30L. Although all of these units are commercial deep fryers, their removable components, drain locations, and electrical areas are not identical. A general cleaning guide can establish the correct sequence, but the model-specific manual determines which parts may be removed and which areas may come into contact with cleaning solution.
What to Prepare Before Cleaning a Commercial Deep Fryer
Having the necessary tools and cleaning supplies ready helps reduce equipment downtime and prevents staff from having to search for containers or brushes midway through the job. Every item should be suitable for a foodservice environment and compatible with the fryer’s materials and the manufacturer’s requirements.
Cleaning Tools and Supplies
Commonly required items include:
- Heat-resistant, oil-resistant cleaning gloves and a non-slip apron;
- Safety goggles or face protection;
- A dedicated fryer brush, a long-handled brush, and non-scratch scrub pads;
- A crumb skimmer, scraper, and small brushes for corners and tight areas;
- A lidded, heat-resistant oil container or compatible oil filtration equipment;
- A fryer-specific cleaner or manufacturer-approved boil-out compound;
- Clean cloths, paper towels, and absorbent materials;
- A wash container for fryer baskets, filters, and other removable components;
- An “Equipment Being Cleaned” sign to prevent other employees from switching the fryer on.
Standard household cleaners are not necessarily suitable for high-temperature commercial equipment. Products that contain highly corrosive ingredients, leave fragrances behind, or are difficult to rinse away may damage metal surfaces or contaminate the fresh oil added afterward. When selecting a cleaner, check the label for compatible materials, dilution instructions, and rinsing requirements.
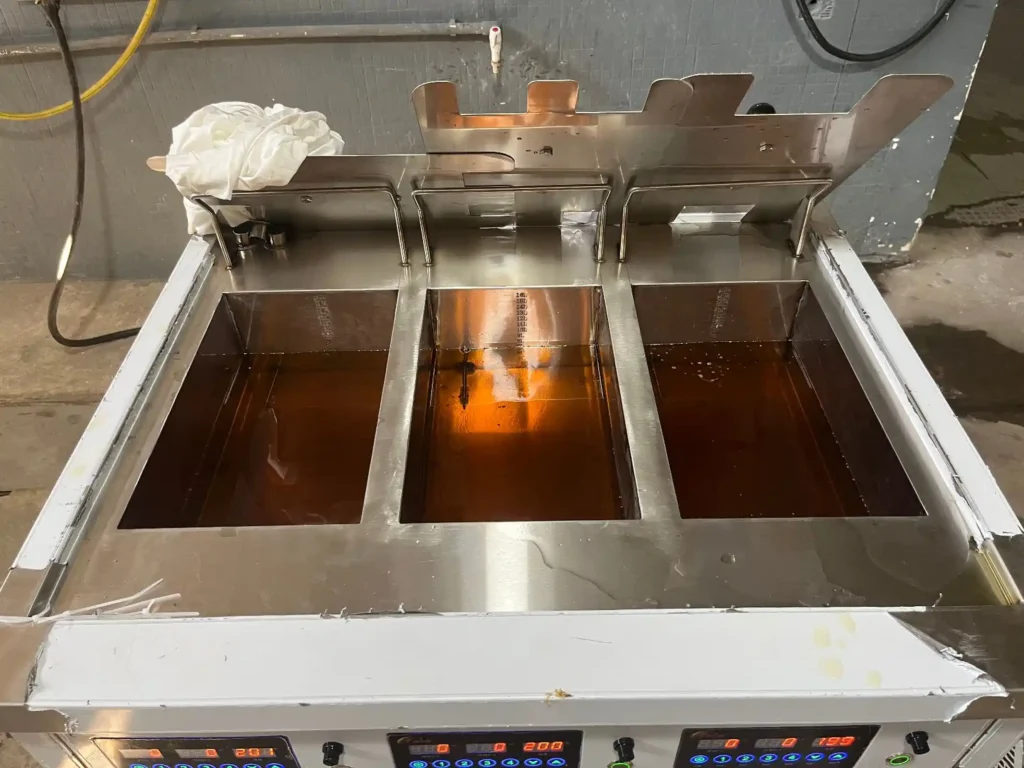
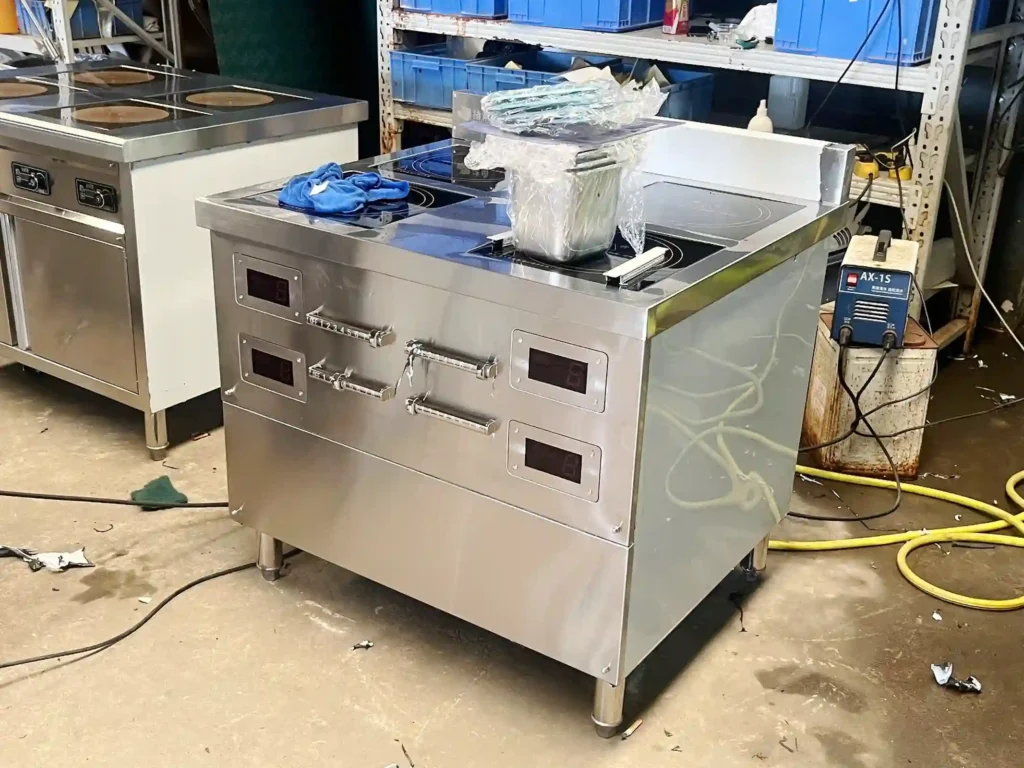
From a manufacturer’s perspective, the front appearance of a fryer tells you little about how easy it will be to clean. It is more useful to check whether the inside of the oil tank is accessible, whether the drain area is clearly visible, whether baskets and supports are easy to remove, and whether cleaning can be performed without exposing the control panel or electrical enclosure to liquid. ATRX’s equipment photo provides a practical visual reference for these points:
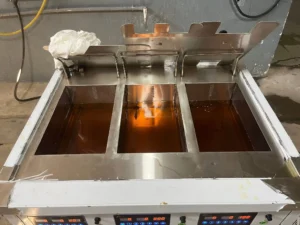
Manufacturer-supplied equipment images should be reviewed alongside the manual for the specific model. A photo alone cannot confirm whether a component is approved for removal or washing.
Safety Precautions Before You Begin
First, switch off the heating function as specified for the equipment, then disconnect the power supply or shut off the gas. Setting the operating switch to “off” does not necessarily mean the fryer is fully isolated from its energy source, so follow the kitchen’s shutdown procedure. If the unit has automatic oil top-up, circulating filtration, or other linked functions, confirm that those systems have also stopped.
Allow the oil to cool to the handling temperature permitted by the equipment manual and filtration system. Hot oil can cause severe burns, while oil that cools too much may thicken and become difficult to drain or filter. Verify the temperature using the equipment display or an appropriate temperature-measuring method. Let the oil cool naturally. Never add water to hot oil, as the water can vaporize rapidly and cause violent splashing.
Keep the floor dry, remove obstacles from around the equipment, and confirm that the drain container has enough capacity. Move oil slowly and never overfill the container. Employees should also know the locations of fire-suppression equipment and emergency shutoffs. If there is a gas odor, damaged wiring, an unusual oil leak, or a control-system fault, stop cleaning and arrange for service.
Cleaning a commercial deep fryer affects more than food quality; it is also part of day-to-day kitchen risk management. The U.S. Occupational Safety and Health Administration’s guidance on restaurant cooking and deep-fryer safety notes that restaurant employees face burn hazards when cleaning deep fryers and when filtering or moving cooking oil. Operators should therefore receive equipment training, use appropriate personal protective equipment and long-handled cleaning tools, and allow oil to cool to a safe handling temperature before moving or filtering it.
A recent incident report highlights an important issue in commercial kitchens: when frying equipment fails, the risk may extend beyond the fryer itself. On September 11, 2026, a London Fire Brigade report on a fast-food restaurant fire stated that investigators believed a commercial fryer fault had ignited the oil. The fire also damaged part of the extraction ductwork running from the restaurant to the roof. The fire service subsequently reminded food businesses to clean extraction systems, hoods, and fans regularly to reduce risks associated with grease buildup.
The report confirmed that an equipment fault ignited the oil; it did not conclude that inadequate fryer cleaning caused the incident. The practical lesson for routine cleaning is that scrubbing the fry pot alone is not enough. Operators should use scheduled cleaning downtime to check for oil leaks, abnormal heating, and electrical faults, while also looking for grease buildup on nearby surfaces and around the extraction system. If the equipment shows signs of a fault, stop using it and arrange for service. Routine cleaning must not be treated as a repair.
How to Clean a Commercial Deep Fryer Step by Step
A standard cleaning procedure should follow a consistent sequence. Begin by handling the cooking oil, then clean the fry pot and components, rinse and dry everything, and only then return the equipment to service. Skipping a step can reintroduce food debris into the fryer or leave water in equipment that is about to be refilled with oil.
Turn Off the Fryer and Allow the Oil to Cool
After cooking has finished, remove visible food particles and switch off the fryer. Follow the equipment manual and wait until the oil reaches a safe draining or filtering temperature. While waiting, you may remove the fryer baskets, basket supports, and any other components approved for removal. Continue to avoid metal surfaces that remain hot.
Place a cleaning notice on the control panel or near the power connection so that another employee does not restart the unit accidentally. On a gas fryer, confirm that the flame is out. On an electric fryer, confirm that the heating elements have stopped operating and handle any lift-up or removable heating assemblies in accordance with the manufacturer’s instructions.
Drain and Filter the Cooking Oil
First, confirm that the drain valve is functioning correctly in the closed position, that the filter machine, filter paper, or screen is properly installed, and that the oil container is correctly positioned. Open the drain valve slowly so the oil flows steadily into the filtration system or heat-resistant container. Draining too quickly can cause splashing and may allow a large amount of debris to block the valve opening.
In practical equipment design, smooth draining often depends on two easily overlooked details: whether debris has been skimmed from the bottom of the fry pot first and whether the drain inlet is clearly visible to the operator. Focusing on the filtration machine without checking the valve opening can simply postpone the problem until the next oil change. Countertop and floor-standing fryers also have different drain heights, so the receiving container must suit the available clearance rather than being positioned the same way for every fryer.
If the oil is still suitable for continued use, filter and store it according to the kitchen’s procedures. Filtration removes food particles and some sediment, but it cannot restore oil that is badly oxidized or has developed an off odor. Oil showing clear signs of deterioration should be placed in a designated waste-oil container and handled through an approved disposal channel in accordance with local requirements. Never pour it into a sink, floor drain, or general waste bin.
After draining, use a dedicated clean-out rod or brush to remove debris from around the drain opening. Use the correct tool when cleaning the valve. Never put a hand or sharp metal object into the valve, as this may cause injury or damage the sealing components.
Clean the Fry Pot and Interior Surfaces
Once the fry pot is empty and has cooled to a safe touch temperature, remove loose grease with a scraper or cloth. Use a dedicated fryer brush to clean the sidewalls, bottom, corners, area around the oil-level line, and surfaces around the probes. Where carbon deposits are heavier, soften them with a manufacturer-approved cleaner before removal.
Work gently, especially around temperature probes, high-limit controls, heating elements, and seals. Knives, steel wool, and hard metal scrapers can scratch the fry pot or damage critical components. If hardened carbon cannot be removed through normal brushing, schedule a boil-out rather than repeatedly scraping with excessive force.
Clean the drain passage and valve inlet as well, or residue may cause a blockage the next time the oil is drained. When finished, inspect the fry pot for blackened residue, clumps of cleaner, or loose particles.
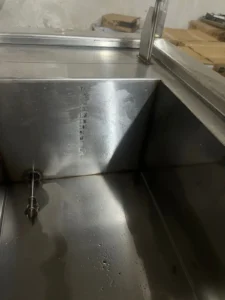
The value of a real cleaning photo is that it shows whether tools can reach the bottom, corners, and drain area—not merely how the fryer looks after cleaning.
Clean the Exterior and Removable Components
Wash fryer baskets, supports, filters, and other removable components separately. Remove food debris first, then use a food-equipment-compatible cleaner and brush to remove the grease film. Rinse thoroughly and leave the parts in a clean area to drain or wipe them dry. Only components that the manufacturer specifically approves for soaking should be submerged for extended periods.
The exterior can usually be wiped with a slightly damp cloth. Focus on handles, edges, areas around the control panel, and seams where grease tends to collect. Do not spray liquid directly onto the control panel, ventilation openings, burners, electrical connections, or other openings. If the cleaning product should be applied to the cloth first, follow the product instructions.
Clean the wall, work surface, and floor around the fryer so that removed grease does not contaminate the equipment again. Before moving the fryer, check the requirements for gas hoses, power cords, and casters. Fixed fryers should not be moved casually by untrained employees.
Rinse, Dry Thoroughly, and Refill the Fryer
Cleaning-chemical residue can affect the oil and food, so rinse the fry pot and removable components thoroughly in accordance with the cleaner’s instructions. Use a clean cloth to inspect corners, the drain opening, and areas around the probes, confirming that no foam, powder, or slippery residue remains.
Drain all water and dry the fry pot with a clean cloth. The drain valve, pipe inlet, fryer baskets, and supports must also be completely dry. Even a small amount of water entering hot oil can cause violent splashing. Before adding oil, check again that the valve is closed, all components are back in place, and the fry pot is dry.
Add filtered oil that is still suitable for use, or fresh oil, keeping the level within the range specified for the equipment. Restore the electricity or gas supply, then follow the startup procedure and preheat at a low temperature while monitoring the fryer. If you notice a leak, unusual odor, abnormal noise, or error message, shut the unit down immediately and inspect it.
How to Boil Out a Commercial Deep Fryer
A boil-out uses water and a fryer-specific boil-out compound to loosen old grease film and carbon deposits inside the fry pot when routine wiping and brushing are no longer sufficient. Water levels, heating modes, and chemical restrictions differ by equipment, so follow both the fryer manual and the cleaning-product label.
When a Fryer Boil-Out Is Needed
Schedule a boil-out when a sticky grease film has formed on the sides and bottom of the fry pot, carbon buildup is clearly visible, routine brushing is no longer effective, or the cleaning plan calls for periodic deep cleaning. High-volume kitchens and operations that frequently fry breaded foods usually accumulate debris faster, so the actual frequency can be adjusted according to daily sediment levels and the condition of the fry pot.
A boil-out cannot correct damaged burners, thermostats, wiring, drain valves, or severe corrosion. If components are deformed or cracked, the fryer leaks continuously, or temperature control is unreliable, shut the equipment down and have it serviced first.
Boil-Out Procedure and Final Rinse
After draining the oil and removing large pieces of debris, confirm that the drain valve is closed. Add clean water to the fry pot as specified by the manufacturer, without exceeding the permitted level. Then add the appropriate amount of fryer boil-out compound according to the product label. Do not increase the concentration on your own, and never mix different cleaning chemicals.
Activate the boil-out or low-temperature heating mode approved for the equipment and maintain the cleaning solution at the condition specified by the manufacturer. The process must be supervised throughout to prevent vigorous boiling, overflow, or a low liquid level. During heating, you may gently brush the interior with a long-handled fryer brush while avoiding vulnerable probes and components.
After the specified cleaning time, turn off the heat and allow the solution to cool to a safe handling temperature before draining it into a container permitted by the kitchen’s procedures. Rinse the fry pot, drain opening, and all areas that contacted the cleaning solution thoroughly with clean water until all chemicals and loosened debris have been removed. Once the solution has fully drained, dry the fry pot completely. Before refilling with oil, inspect low points, seams, and areas around the valve, as these locations are the most likely to retain water.
How Often Should You Clean a Commercial Deep Fryer?
Cleaning frequency depends on sales volume, the types of food being fried, the amount of breading residue, the fryer design, and the manufacturer’s requirements. Rather than applying one fixed number of days, it is more practical to establish a schedule that combines daily cleaning, weekly cleaning, and condition-based checks, with records showing that each task has been completed.
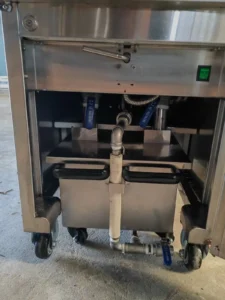
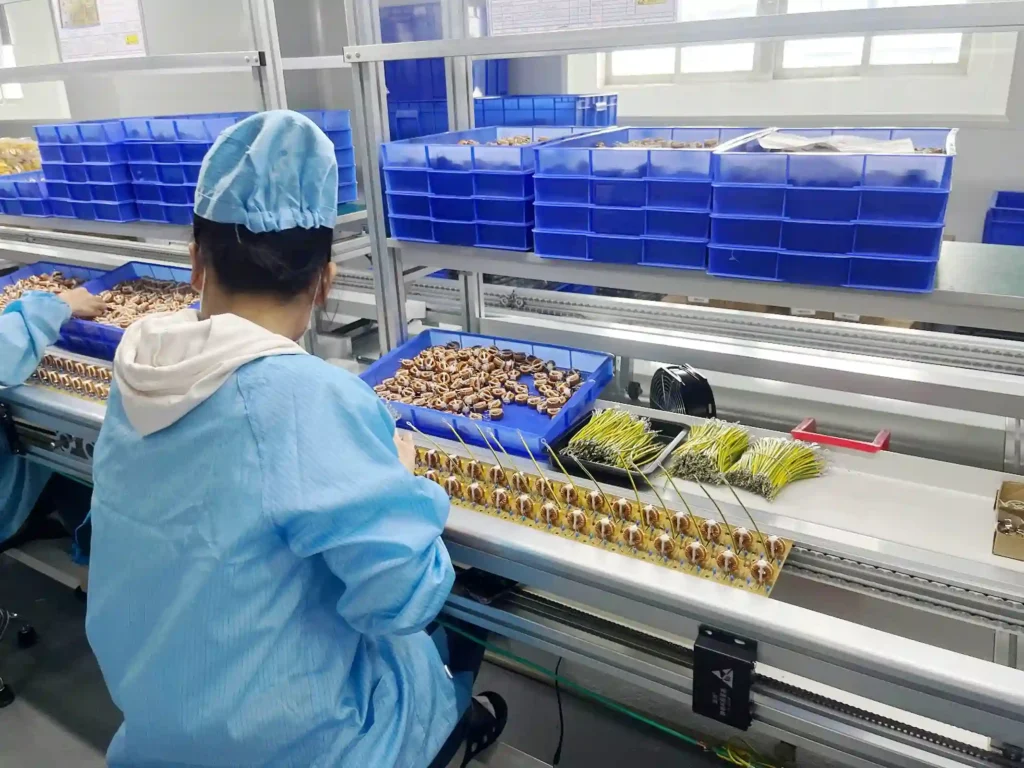
On-site images supplied by a manufacturer or customer can show that the equipment is genuinely being used in a commercial environment, but they cannot prove that one fixed cleaning interval is suitable for every operation. Only when menu, volume, residue, and oil-condition records are considered together does an image become useful operating evidence rather than simple promotional material.
Daily Cleaning and Oil Filtration
During service each day, use a crumb skimmer to remove floating particles before they continue carbonizing in hot oil. At closing, check the oil’s color, odor, foaming, and sediment at the bottom of the fry pot, then filter the oil according to the equipment and kitchen procedures. Clean the fryer baskets, supports, exterior grease, and surrounding work area on the same day.
High-volume kitchens may need to add filtration cycles between service periods. Base this decision on the amount of debris, changes in the color of fried food, and the condition of the oil after filtration. Oil filtration should be carried out by employees trained on the equipment, using a filtration system compatible with the fryer.
Weekly Deep Cleaning
Most commercial kitchens need to schedule cleaning that is more thorough than the daily wipe-down. This includes emptying the oil tank, brushing the fry pot, cleaning the drain area, and inspecting removable components. Whether a boil-out is required every week should be determined by the manufacturer’s recommendation and the actual level of carbon buildup. Lightly used equipment may not need a weekly boil-out, while heavily used fryers may need one more frequently.
During deep cleaning, also check whether fryer baskets are deformed, filters are damaged, seals are deteriorating, and the drain valve operates smoothly. These visual checks can help identify problems early, but any work involving equipment disassembly, gas systems, or electrical components should be left to a qualified professional.
When to Replace the Cooking Oil
Filtered cooking oil still needs to be replaced periodically. If any of the following conditions appear, use the kitchen’s oil-quality standards to determine whether the oil should be taken out of service:
- The oil has darkened noticeably and still contains a large amount of fine sediment after filtration;
- It continues to foam or smoke at the normal operating temperature;
- It develops a rancid, burnt, or otherwise unusual odor;
- Fried food becomes too dark, greasy, or develops an off flavor;
- The oil becomes viscous, with clearly reduced flow and filtration performance.
Oil life varies significantly with the food being cooked and the kitchen’s operating volume, so it should not be replaced mechanically according to the date alone. Combining oil-condition checks, filtration records, and finished-product quality provides a more practical basis for commercial kitchen operations.
Common Commercial Deep Fryer Cleaning Mistakes to Avoid
Cleaning incidents and avoidable rework often result from a few easily overlooked actions:
- Draining oil while the fryer is still heating. Excessive oil temperature increases the risk of splashing and burns. Wait until the oil reaches the equipment’s specified safe handling range.
- Adding water to hot oil. Water can vaporize rapidly and force hot oil out of the fryer. Do not begin any rinsing process until all cooking oil has been drained.
- Using an unsuitable oil container. Standard plastic buckets may deform under heat, while undersized containers can overflow. Use compatible filtration equipment or a suitable heat-resistant container.
- Mixing cleaning chemicals. Combining products may cause a hazardous reaction or release harmful gases. Follow the label and use one compatible cleaning product at a time.
- Scraping carbon deposits with sharp tools. Sharp tools can scratch the fry pot or damage probes and seals. Treat stubborn carbon with an appropriate cleaner and boil-out procedure.
- Failing to dry the fryer completely after rinsing. Residual water can cause splashing when fresh oil is added and heated, and it may also accelerate oil degradation.
- Ignoring the drain valve and filtration system. A clean-looking fry pot does not mean the drain passage is clear. Include the valve opening, filter paper, filter screen, and pipework in the cleaning procedure.
- Returning the fryer directly to high-temperature operation after cleaning. After refilling and restarting, verify the oil level, valve position, and equipment condition before gradually returning to the normal operating temperature.
Turning the cleaning procedure into a kitchen checklist and assigning responsibility for shutdown, draining, brushing, reassembly, and final verification can reduce omissions. New employees should complete equipment training before performing the procedure independently.
For a commercial induction fryer, there is another practical distinction: the oil tank and electrical enclosure are separate cleaning zones. Grease must be removed from the oil tank, the cleaning chemical rinsed away, and the tank dried completely. The control panel, ventilation openings, and electrical connections, however, must not be sprayed directly with water. A stainless steel exterior does not mean the entire unit can be hosed down. CE certification supplied by the manufacturer indicates that the product has the relevant compliance documentation, but it does not replace the cleaning instructions for the specific model or prove that any cleaning method is acceptable.
When to Call a Professional for Fryer Cleaning or Maintenance
Routine oil filtration, exterior cleaning, and manual-compliant fry-pot cleaning can generally be performed by trained kitchen employees. Stop using the equipment and contact a qualified commercial kitchen equipment service technician if any of the following occurs:
- You smell gas, or burner ignition or flame behavior is abnormal;
- The power cord, plug, control panel, or heating element is damaged;
- Temperature control is unstable, the equipment overheats, or safety protection trips repeatedly;
- The fry pot, drain valve, piping, or filtration system leaks oil continuously;
- The drain passage is severely blocked and cannot be cleared through normal cleaning;
- The fry pot is cracked, visibly corroded, deformed, or affected by heavy carbon buildup that cannot be removed;
- The fryer still has an unusual odor, makes abnormal noises, displays an error, or fails to start after cleaning.
A qualified technician can inspect the temperature controls, safety devices, gas or electrical system, and components that require disassembly. The kitchen team should keep cleaning and fault records that note when the problem appeared, the condition of the equipment, and the actions already taken. This information can help the technician diagnose the issue more efficiently.
The key to cleaning a commercial deep fryer is to follow a consistent sequence, allow sufficient cooling time, handle cooking oil correctly, and dry the equipment thoroughly. Manufacturer documentation, real equipment photos, and customer-site images can help operators understand the fryer, but the manual for the specific model should remain the final reference. A manual-based division of responsibilities covering daily cleaning, scheduled deep cleaning, and professional service can help maintain fried-food quality while reducing the risks employees face when working around hot oil.
About the author

ATRX Team| 18 Years Commercial
Induction Cooker Manufacturer in China
Induction Cooker Manufacturer in China
Related Posts
How to Install a Built-In Induction Cooktop: A Step-by-Step Guide
09/17/2026
How to Clean a Commercial Deep Fryer: A Step-by-Step Guide
09/13/2026
High Quality Commercial Induction Cooker Manufacturer
09/09/2026
Automatic Wok Machine: Types, Specifications, Applications and Buying Guide
08/18/2026
What Is a Commercial Induction Cooker and How Does It Work
08/13/2026
Commercial Induction Range for Hotel Kitchens: How to Choose the Right Model
08/11/2026
China Commercial Induction Cooker Manufacturer
08/09/2026
10 Best Commercial Induction Cooker Manufacturers & Supplier Selection Guide [2026]
08/07/2026
Tilting Skillet & Bratt Pan: How to Choose the Right One for Your Commercial Kitchen
08/06/2026

Commercial Induction Cooker for School Cafeteria: How to Pick the Right High-Power Unit
08/04/2026