

How to Choose a Commercial Induction Soup Cooker — A Buying Guide for Restaurant Owners
07/02/2026
Estimated reading time: 2 minutes

This induction soup cooker buying guide solves one problem: how to get your purchase right the first time — no mismatched models, no misleading specs, no equipment sitting idle on arrival day. From model selection to parameter verification, the entire decision-making process is mapped out here. Walk through it step by step and you’ll finish procurement with confidence.
IN THIS ARTICLE
What Types of Commercial Induction Soup Cookers Are There?
Before choosing a commercial induction soup cooker, the first step isn’t comparing prices or checking wattage. It’s understanding what models actually exist. Many restaurant owners stare at a supplier’s product list for the first time and feel completely lost. The names look similar, the shapes don’t match, and the functions are clearly different. This section helps you tell the four mainstream models apart by appearance, then points you straight to the one that fits your kitchen.
The Four Models Look Completely Different from Each Other
During visits to multiple production lines across the Pearl River Delta, our ATRX product team found that many buyers can’t tell these four models apart at a glance. The fixed type and the tilting type get mixed up constantly. So before any spec talk, let’s nail down what each one actually looks like.
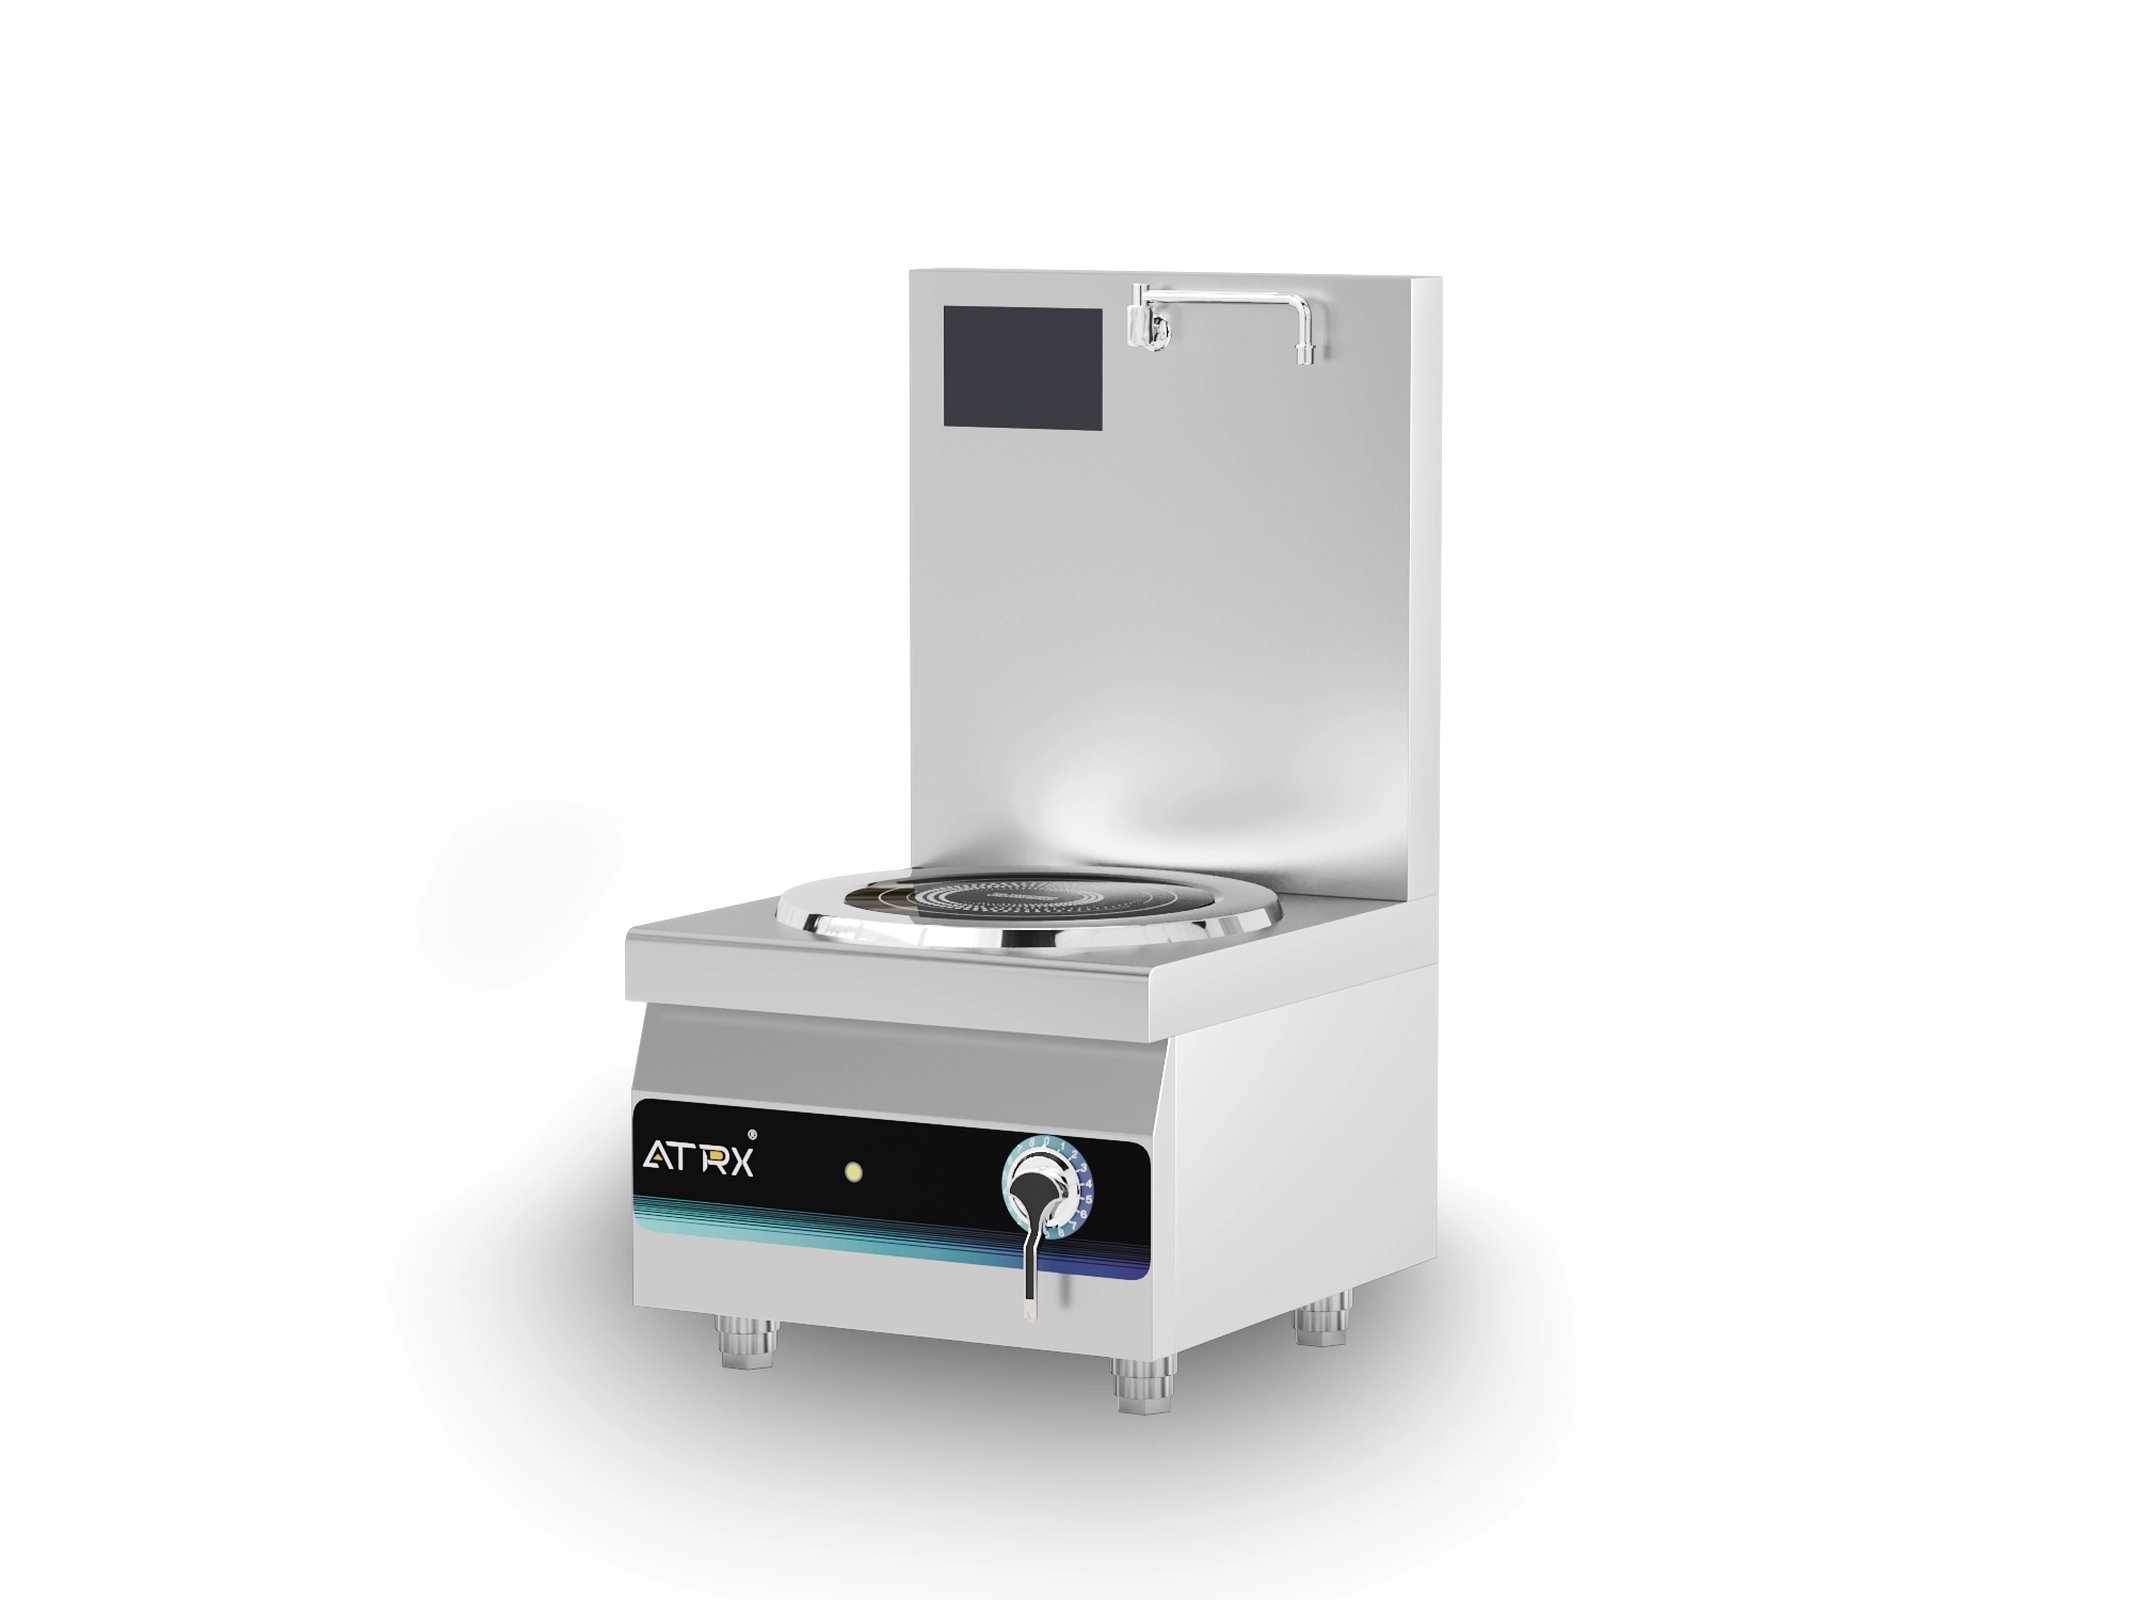
1. Freestanding Single-Head Soup Cooker
One burner, one pot position. The body is the narrowest of all four — basically a square cabinet with a heating panel set into the top. Simplest structure, easiest to spot.
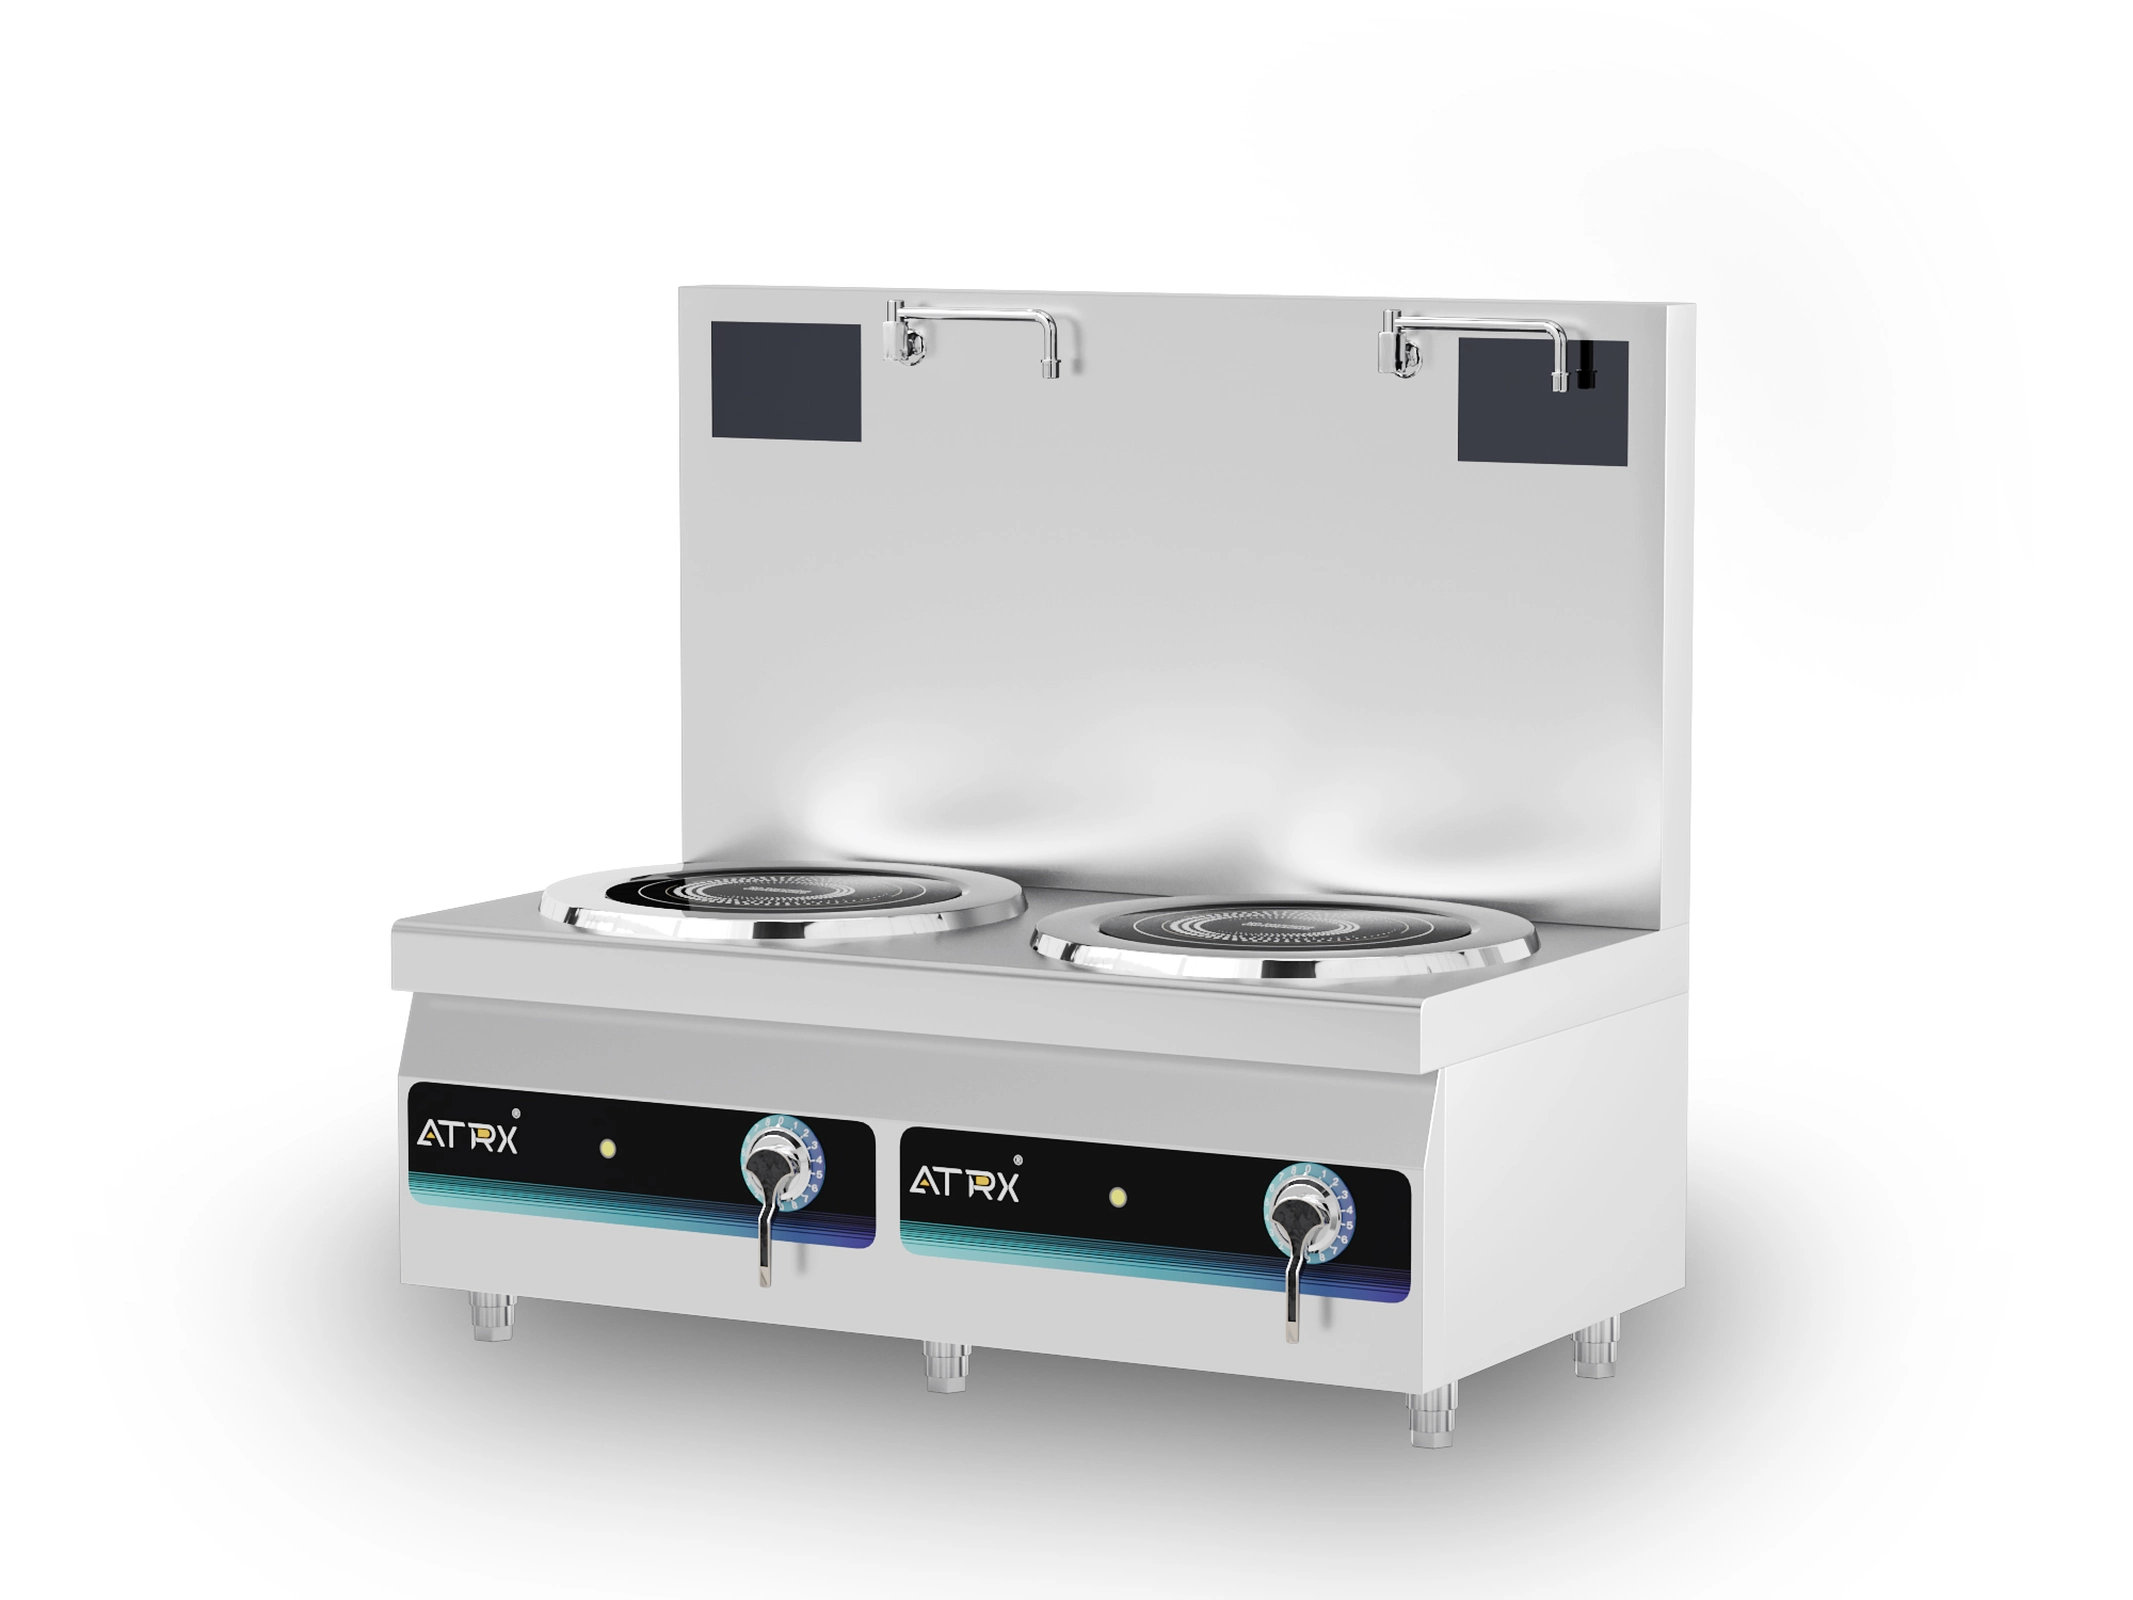
2. Double-Head Soup Cooker
Two single-head units merged onto one shared base. Two burners sit side by side, two pot positions. Overall width is nearly double a single-head, but the shared housing makes it noticeably more compact than placing two separate machines next to each other.
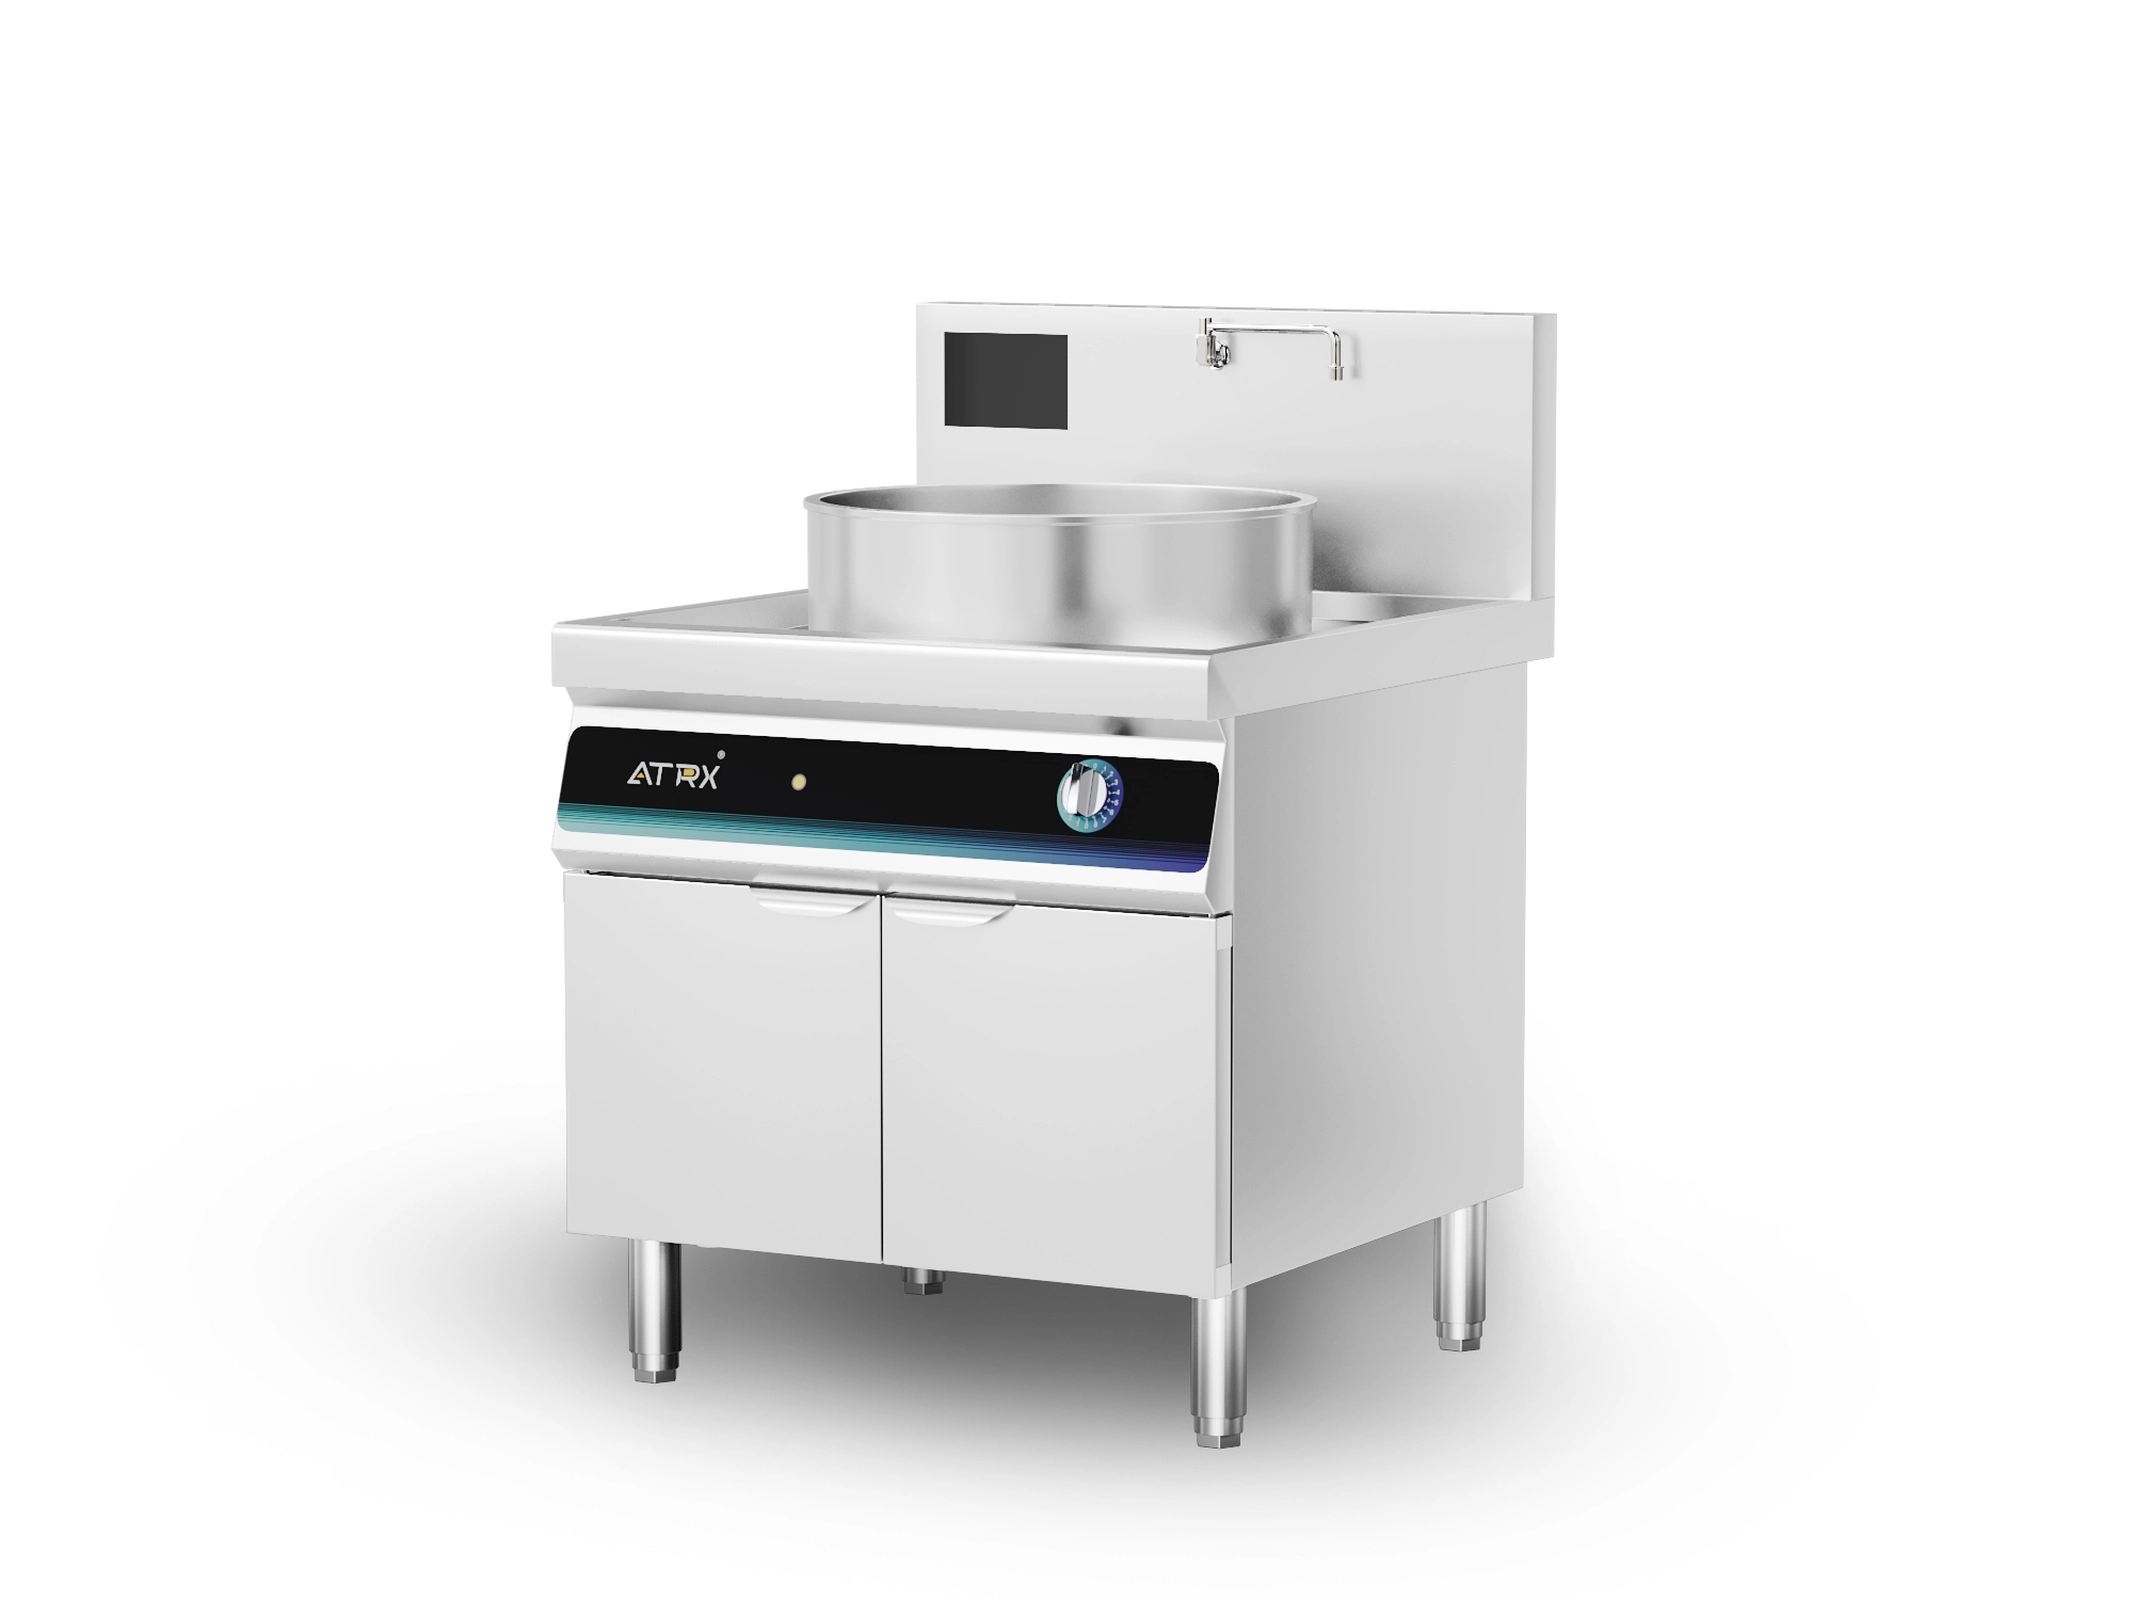
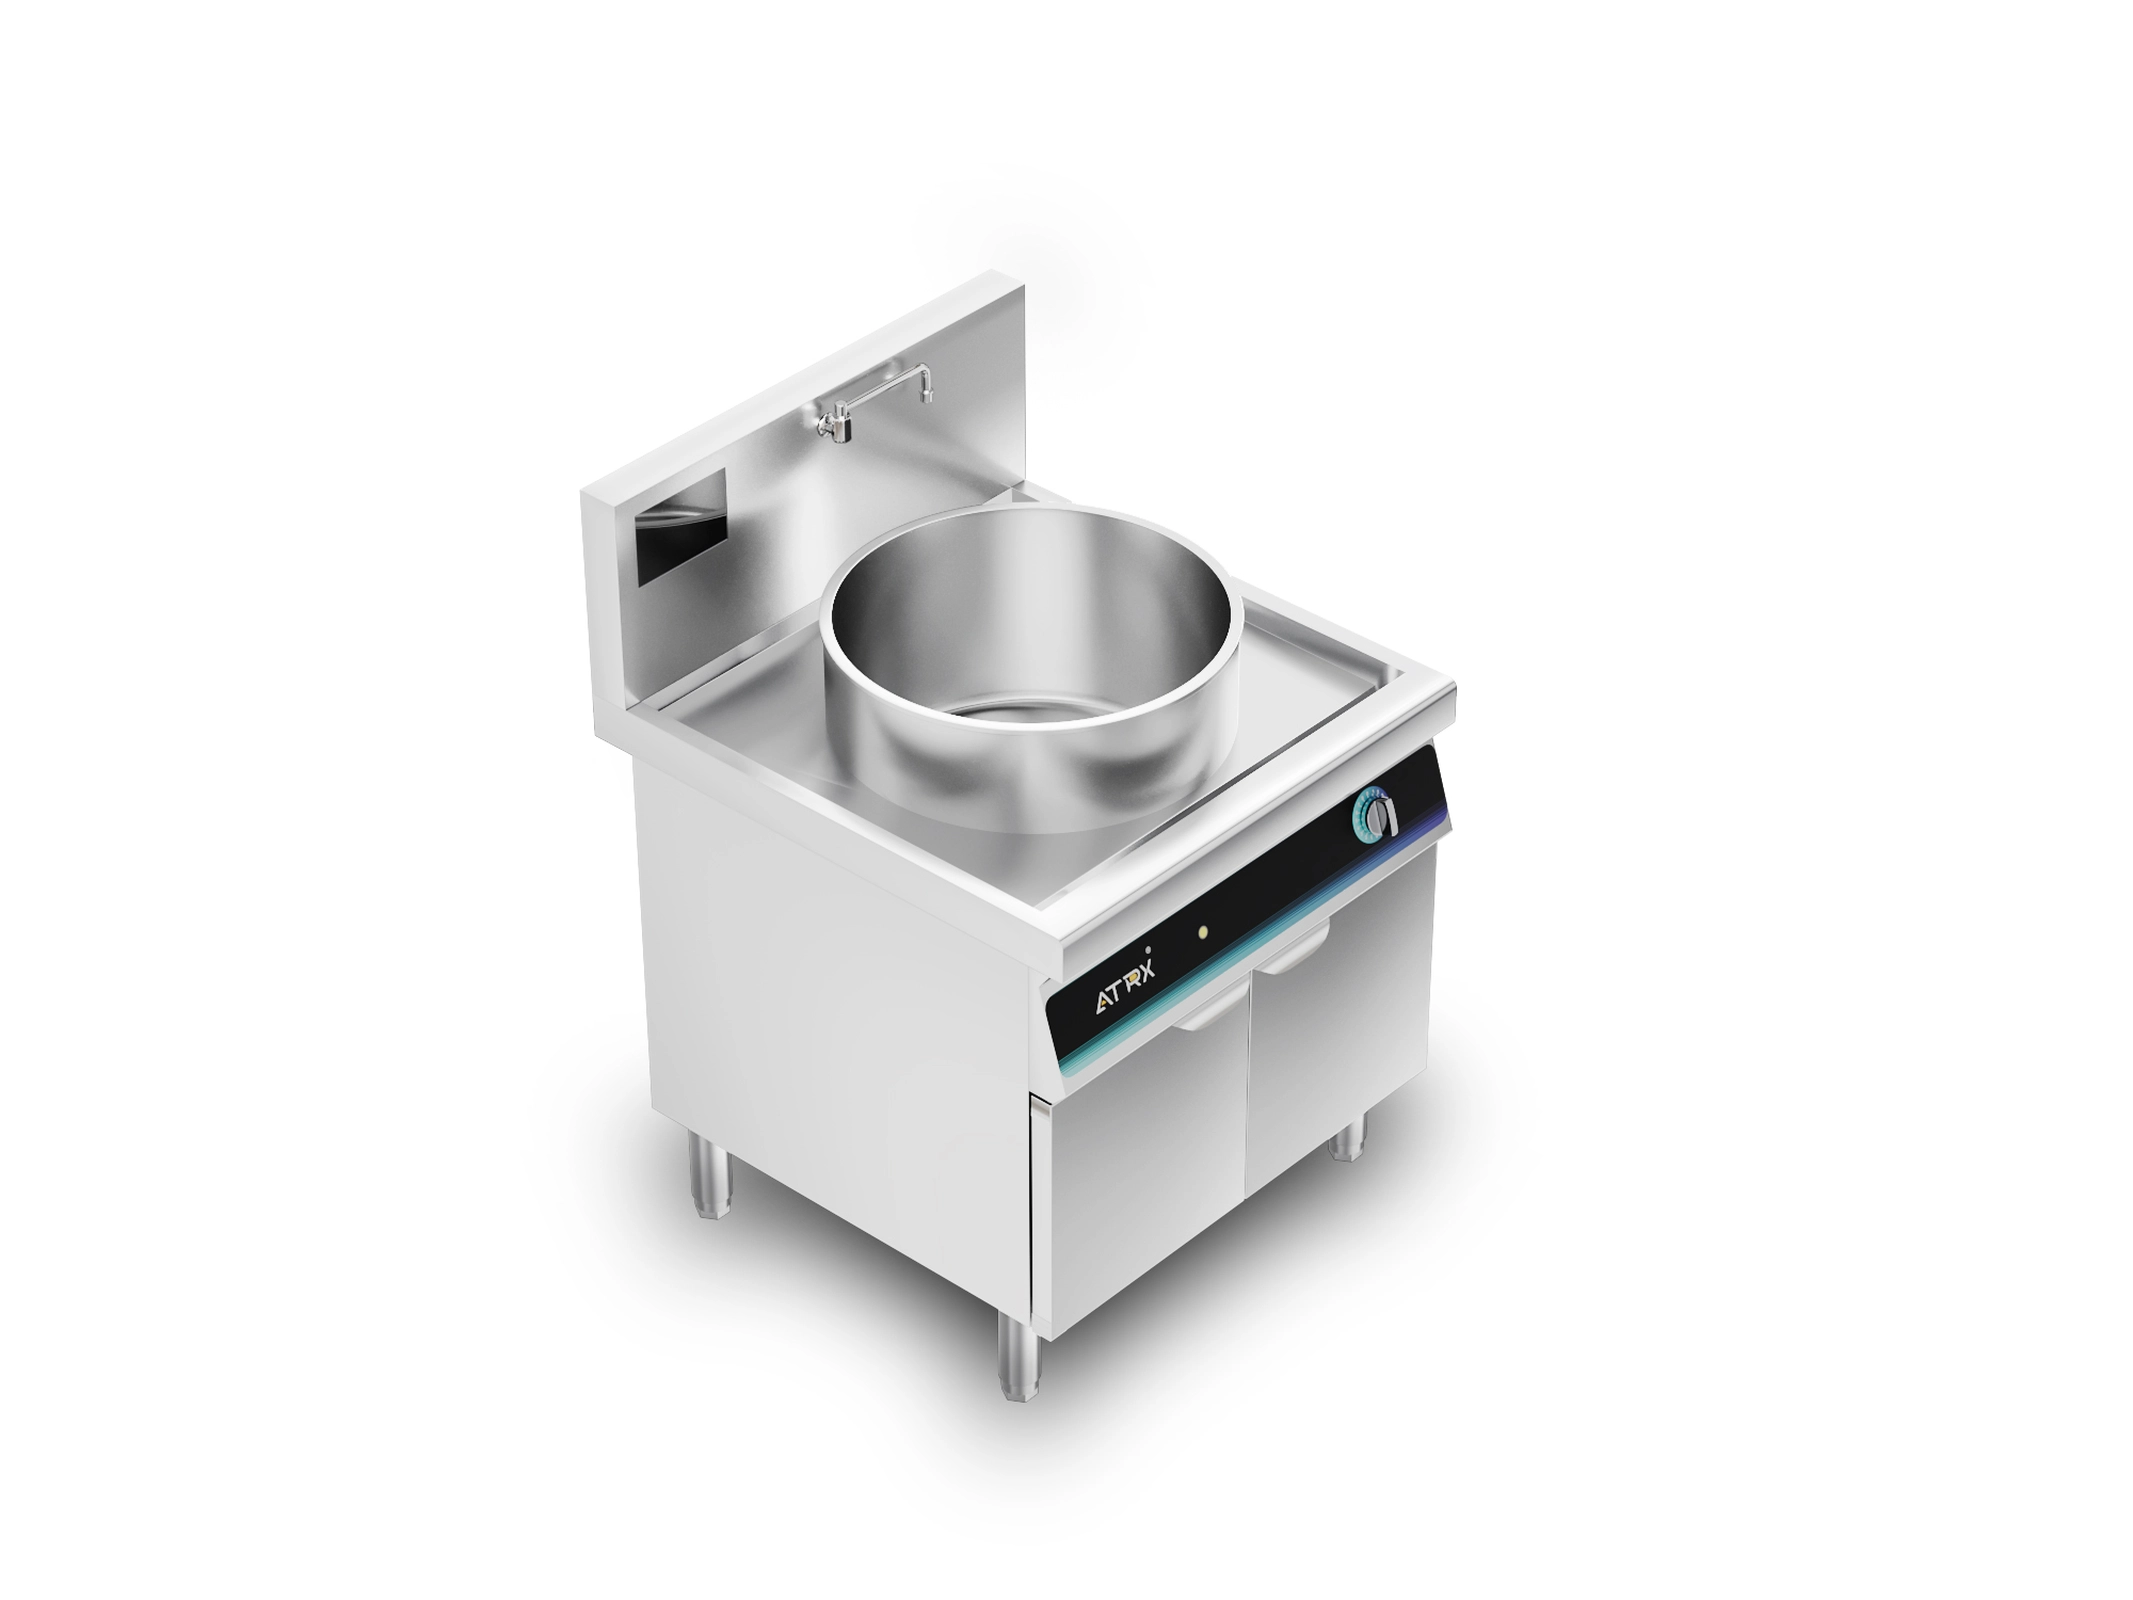
3. Fixed Braising Soup Cooker
The key difference from the first two: this commercial induction braising cooker comes with a built-in deep pot. The pot and body are one piece — no need to buy a separate pot. From the side, it sits taller because of the pot depth.
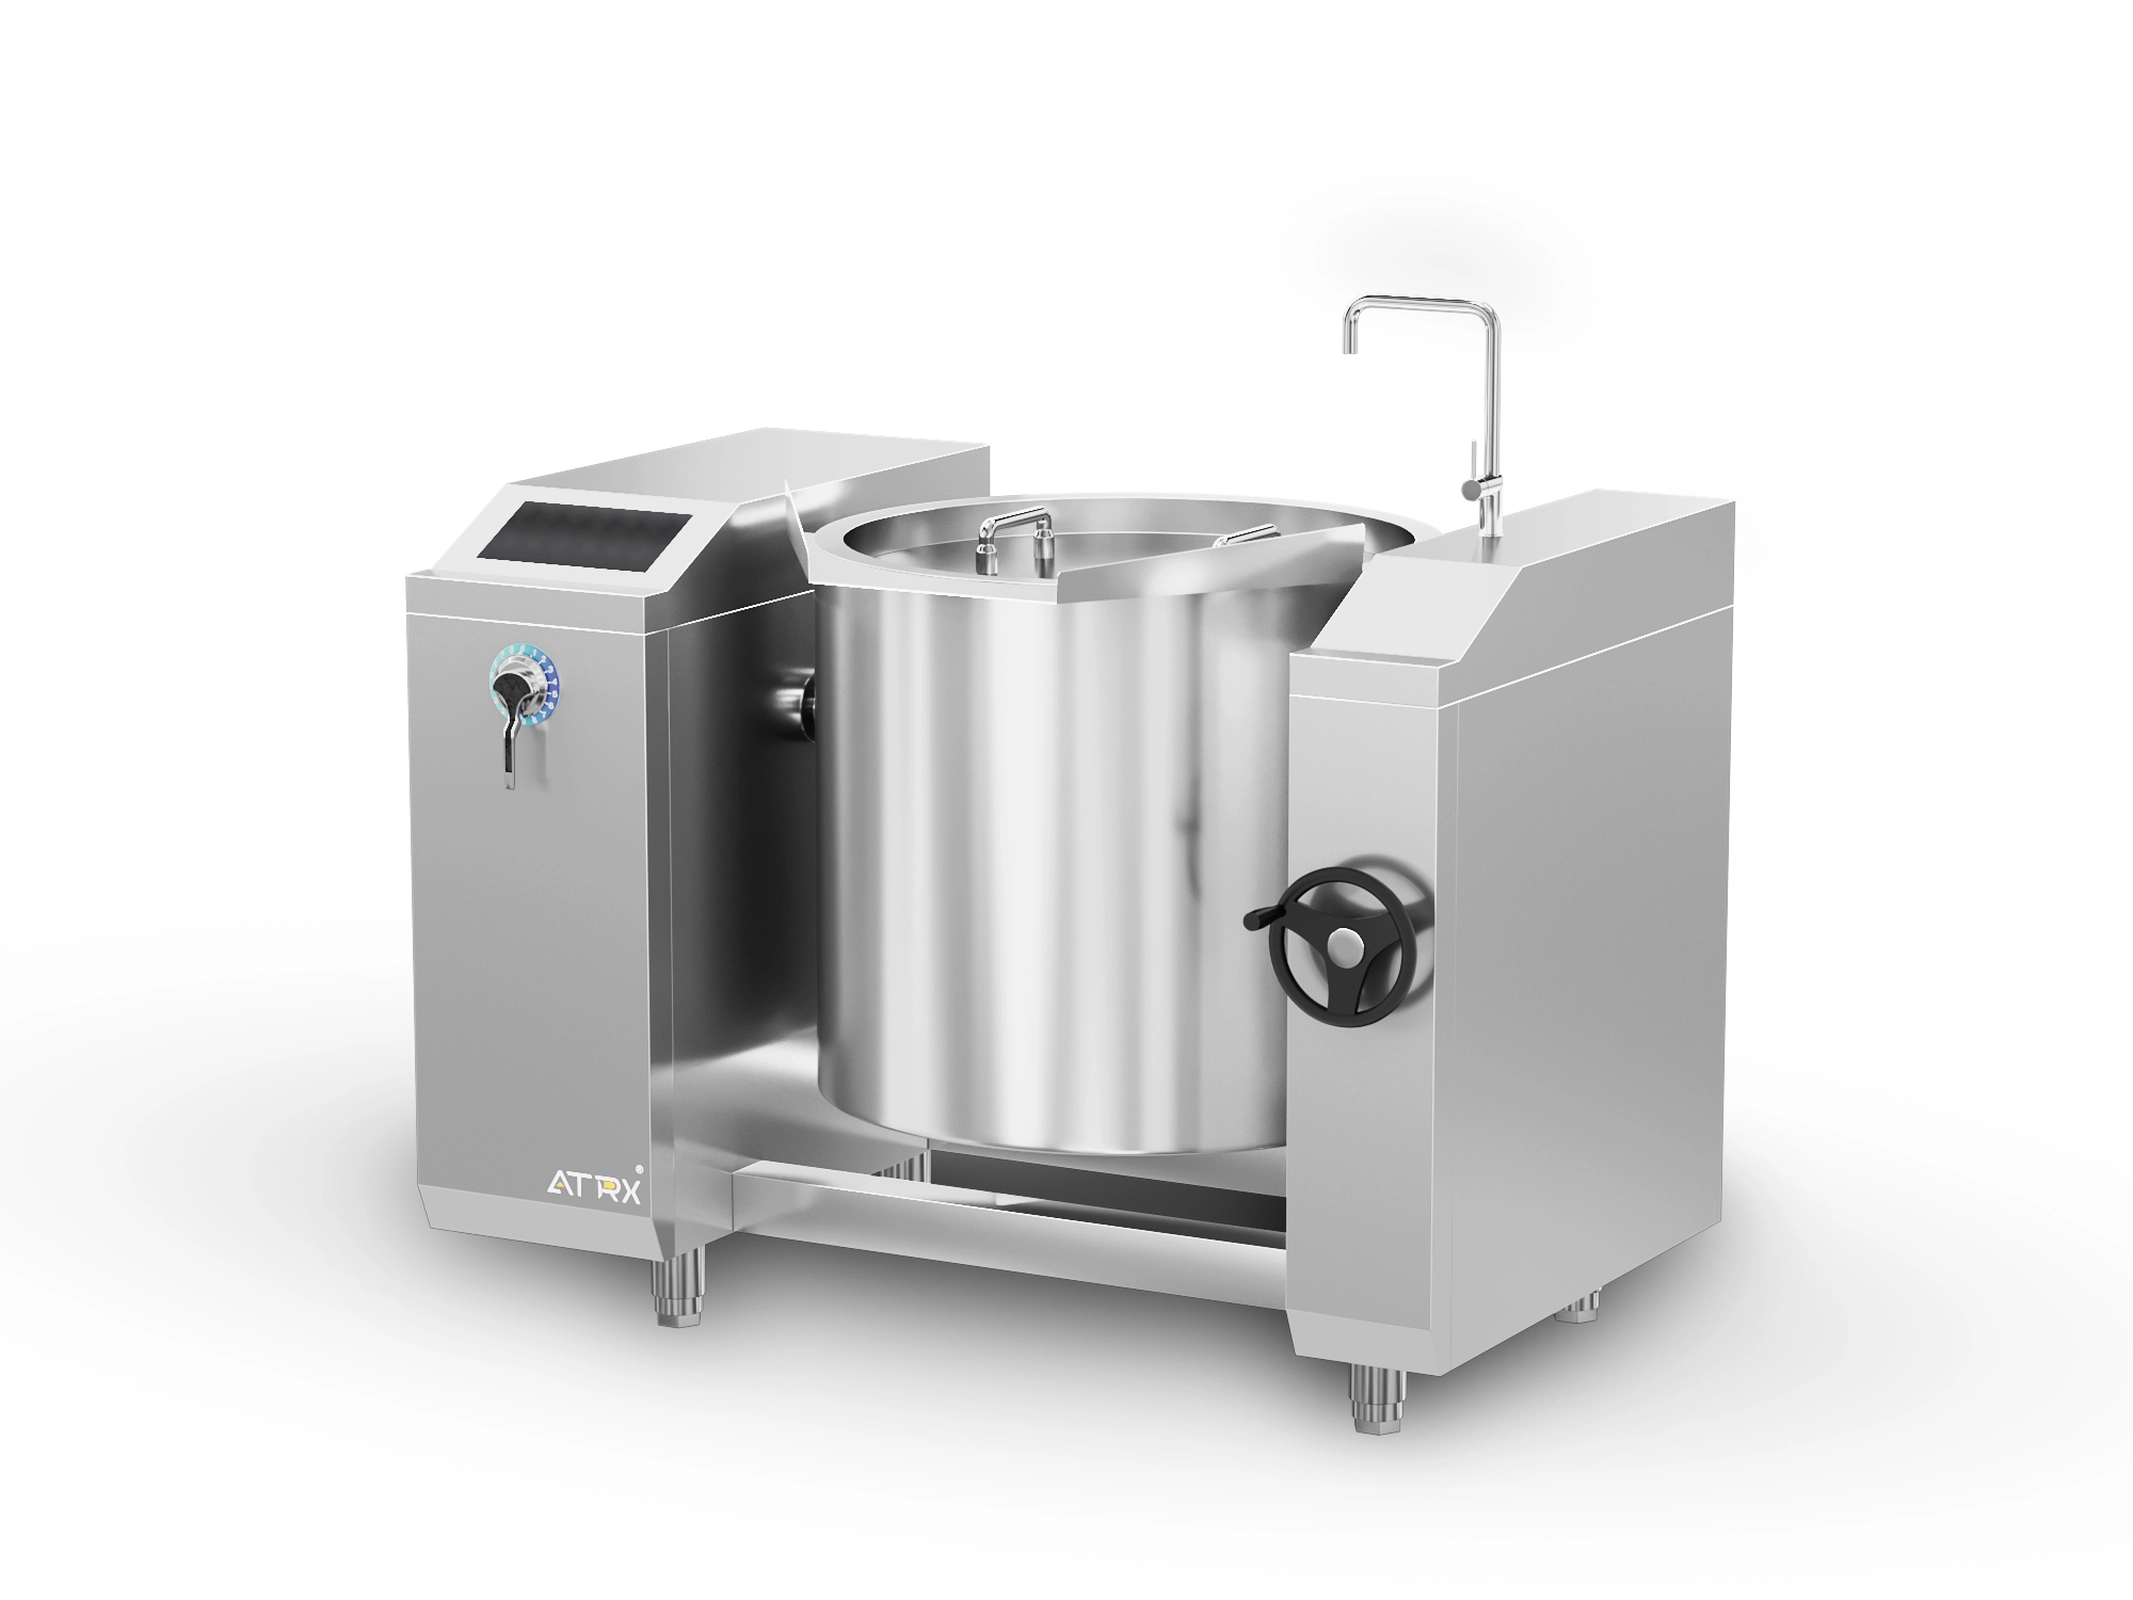
4. Tilting Soup Cooker
Looks a lot like the fixed type at first glance — same integrated pot. But there’s a handwheel or electric tilting mechanism on the side of the pot. That’s the giveaway. This mechanism lets the entire pot tilt forward so you can pour everything out in one go — the same core principle behind a traditional tilting soup kettle, now paired with induction heating.
Four quick identifiers so you never mix them up: single-head = one burner, narrowest body. Double-head = side-by-side burners on a shared base. Fixed = built-in deep pot, one-piece build. Tilting = handwheel or electric lever on the pot’s side.
Match Your Kitchen Type to the Right Model
Now that you can tell the four apart on sight, the next step is matching your kitchen type. Different operations need very different things, and picking the right model matters more than picking the right brand.
Running a small street-side shop or a single-item soup restaurant? A freestanding single-head cooker is all you need. Smallest footprint, lowest investment — perfect when every square meter of kitchen space counts. Running a hot pot restaurant or any place that serves two different soup bases at the same time? Go with a double-head. Each burner has its own temperature control; they don’t interfere with each other.
If your back kitchen focuses on long, slow-simmered bone broth or braised sauces, the fixed braising type is your pick. The integrated deep pot is built for big-batch, hours-long cooking — no hunting for a matching pot afterward. For operations pushing 300-plus meals a day — school cafeterias, hotel banquet kitchens, central kitchens — the tilting cooker is pretty much the only option that makes sense. Turn the handwheel or hit the electric switch, and the whole pot tilts to pour. The speed difference for high-volume output and cleanup isn’t even close.
One group-meal operator told us he originally bought a fixed model to save money. Every evening, two staff members spent 40 minutes scooping out over 150 kg of bone broth with ladles. After switching to a tilting model, the entire pour took under three minutes. His takeaway: “I should have just bought the tilting one from the start.”
| Your Kitchen Type | Recommended Model | Key Reason |
|---|---|---|
| Street-side shop / single-item soup restaurant | Freestanding single-head soup cooker | Smallest footprint, lowest investment — handles one soup per day with ease |
| Hot pot restaurant / two soup bases at once | Double-head soup cooker | Independent temperature control on each burner, zero interference |
| Chinese back kitchen (bone broth, braised sauces) | Fixed braising soup cooker | One-piece deep pot, no extra pot needed, built for long cooking sessions |
| School cafeteria / hotel / central kitchen (≥300 meals/day) | Tilting soup cooker | Full-pot tilt-and-pour — batch output and cleanup efficiency far ahead of other types |
How Much Power and Capacity Do You Actually Need?
Power and capacity are the two numbers that matter most on a commercial electric soup cooker. Power controls how fast you boil. Capacity controls how much you get per batch. A lot of owners pick both by feel the first time around, then discover their soup can’t keep up with the lunch rush — or the pot is too small and they’re re-cooking all day long. Here’s how to size both correctly.
Power Determines How Long You Wait for a Pot to Boil
Power does one thing: it sets your heating speed. Higher power means a shorter path from room temperature to rolling boil, which means more breathing room during service. The industry formula is straightforward — Heating Time (min) ≈ 330 × Water Volume (L) ÷ 60 ÷ Power (kW). Combine that with real factory test data, and the gaps become very clear. Here’s what happens with an 87L stock pot filled to 80% (about 70L):
8kW — roughly 48 minutes to boil. Almost a full hour. If your lunch rush needs frequent pot turnover, you’ll barely squeeze one batch out of an entire service window.
12kW — about 32 minutes. Nearly a third faster. For a noodle shop with moderate output, this gives you just enough time to get a pot ready in half an hour and still have room for seasoning and plating.
15kW — 26 minutes. This is the sweet spot for most mid-sized restaurants with clear lunch and dinner peaks that need a fresh pot every hour. Best cost-to-performance ratio as a starting point.
18kW — 22 minutes. Better suited for chain fast-food or group-meal counters where the pace is tighter.
25–30kW — built for large-capacity operations, often paired with an industrial induction soup pot. At 25kW, 200L takes about 44 minutes; at 30kW, around 37 minutes. Central kitchens or big cafeterias cooking hundreds of liters per run typically need this tier to stay on schedule.
Double the power, roughly halve the boiling time. That’s not just theory — ATRX engineers verified it in head-to-head factory tests. Same 87L pot, switching from 8kW to 15kW cut boiling time from nearly 50 minutes down to 26. That gap alone decides whether a restaurant survives the lunch rush or falls behind.
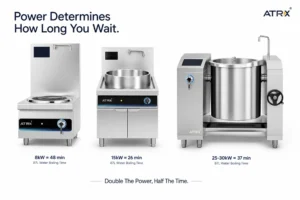
The takeaway for power selection is simple: figure out how fast you need one pot to boil during your busiest hour, then work backward to the wattage. Always leave a buffer. Don’t park yourself right on the edge.
Capacity: Work Backward from Your Daily Soup Output
No guesswork needed here — a quick reverse calculation does the job. First, estimate your total daily soup volume: each serving runs 300–500ml (small bowl ≈ 300ml, large bowl or noodle soup ≈ 500ml), multiplied by the number of servings you expect to sell. That’s your daily total.
Second, decide how many batches you want to cook. If you plan on two batches — one morning, one evening — each batch needs to hold at least half the daily total. Match that figure to the capacity options in the product range and you’ve got your answer.
| Pot Capacity | Servings per Pot (Reference) | Suitable Daily Output | Typical Application |
|---|---|---|---|
| 58L – 84L | ~100–170 people | Under 100 servings | Small noodle shops, single-item soup spots, neighborhood stalls |
| 87L × 2 (double-head) | ~360 people | 150–300 servings | Small-to-mid chain fast food, dual-soup-base shops |
| 115L – 150L | ~250–350 people | 200–400 servings | Mid-sized restaurants, hotel kitchens, corporate cafeterias |
| 170L – 200L | ~350–500+ people | 500+ servings | Large cafeterias, group-meal operators, central kitchens |
One tip a lot of owners miss: buy one size up from your calculated number. Your daily output is an average. Weekends, holidays, grand openings, and winter peaks can easily push demand 30% higher — or more.
If your pot just barely covers a normal day, any spike forces emergency re-cooking. That throws off the whole kitchen rhythm and makes consistent quality almost impossible. A slightly bigger pot costs a little more upfront but pays for itself in peak-hour calm and product consistency.
Already have a rough idea of the power and capacity range you need? Head over to the ATRX commercial induction soup cooker product page and filter by capacity. Models run from 50L to 200L, each with full specs listed so you can cross-check against your numbers.
Single vs. Double Head, Fixed vs. Tilting — How to Decide?
When buying a commercial induction soup kettle, many owners jump straight to power ratings and pot thickness. But two more basic questions come first: How many pots do you need going at the same time? And how do you get the finished soup out? Those answers lock in whether you need single or double head, and fixed or tilting. Get this right and everything downstream gets easier.
How Many Soups at Once = Single or Double Head
This one is a simple counting exercise. How many pots need to be on a burner at the same time each day? Count them, and the answer is right there.
Step One: Look at your soup menu. If you only sell one soup, or your soups can take turns on the burner without overlapping, a single-head unit is enough. Overall width is usually around 650mm — about the size of a small desk. Fits easily even in tight kitchens, runs as a one-person operation, and maintenance is dead simple.
Step Two: Check for “must run at the same time” situations. If two pots genuinely need to work in parallel — like a hot pot restaurant where clear broth and spicy broth both have to be ready all evening, or a breakfast spot where plain congee and multigrain congee both need to land before the doors open — go straight for a double-head. Each burner has fully independent temperature control. One side at full boil, the other on a gentle simmer — no problem at all.
Step Three: Compare footprint and wiring, then decide. A double-head unit runs about 1,300mm wide — close to two single-heads side by side. But the shared frame makes it more compact overall, the cabling is cleaner, and you only need one power connection instead of two. If you’re scaling across multiple locations, that difference in installation time and tidiness adds up fast. Bottom line: the only variable is “how many pots at once.” Answer that and you won’t buy wrong.
How You Pour the Soup Out = Fixed or Tilting
Once single vs. double is settled, the next question is: how do you actually get the soup out of the pot? That one action determines fixed vs. tilting.
A fixed soup cooker has its pot locked to the frame — it doesn’t move. You either ladle soup out one bowl at a time or open a drain valve at the bottom. That’s a natural fit for dine-in restaurants where customers arrive in waves, the kitchen portions one serving at a time, and the soup stays warm in the pot all through service.
A tilting soup cooker works completely differently. A handwheel on the side lets you tilt the whole pot forward, pouring an entire batch into holding containers in minutes. It’s built for central kitchens that cook 200L of stock and need to fill distribution containers fast, or for cafeterias that transfer everything to the serving line before doors open.
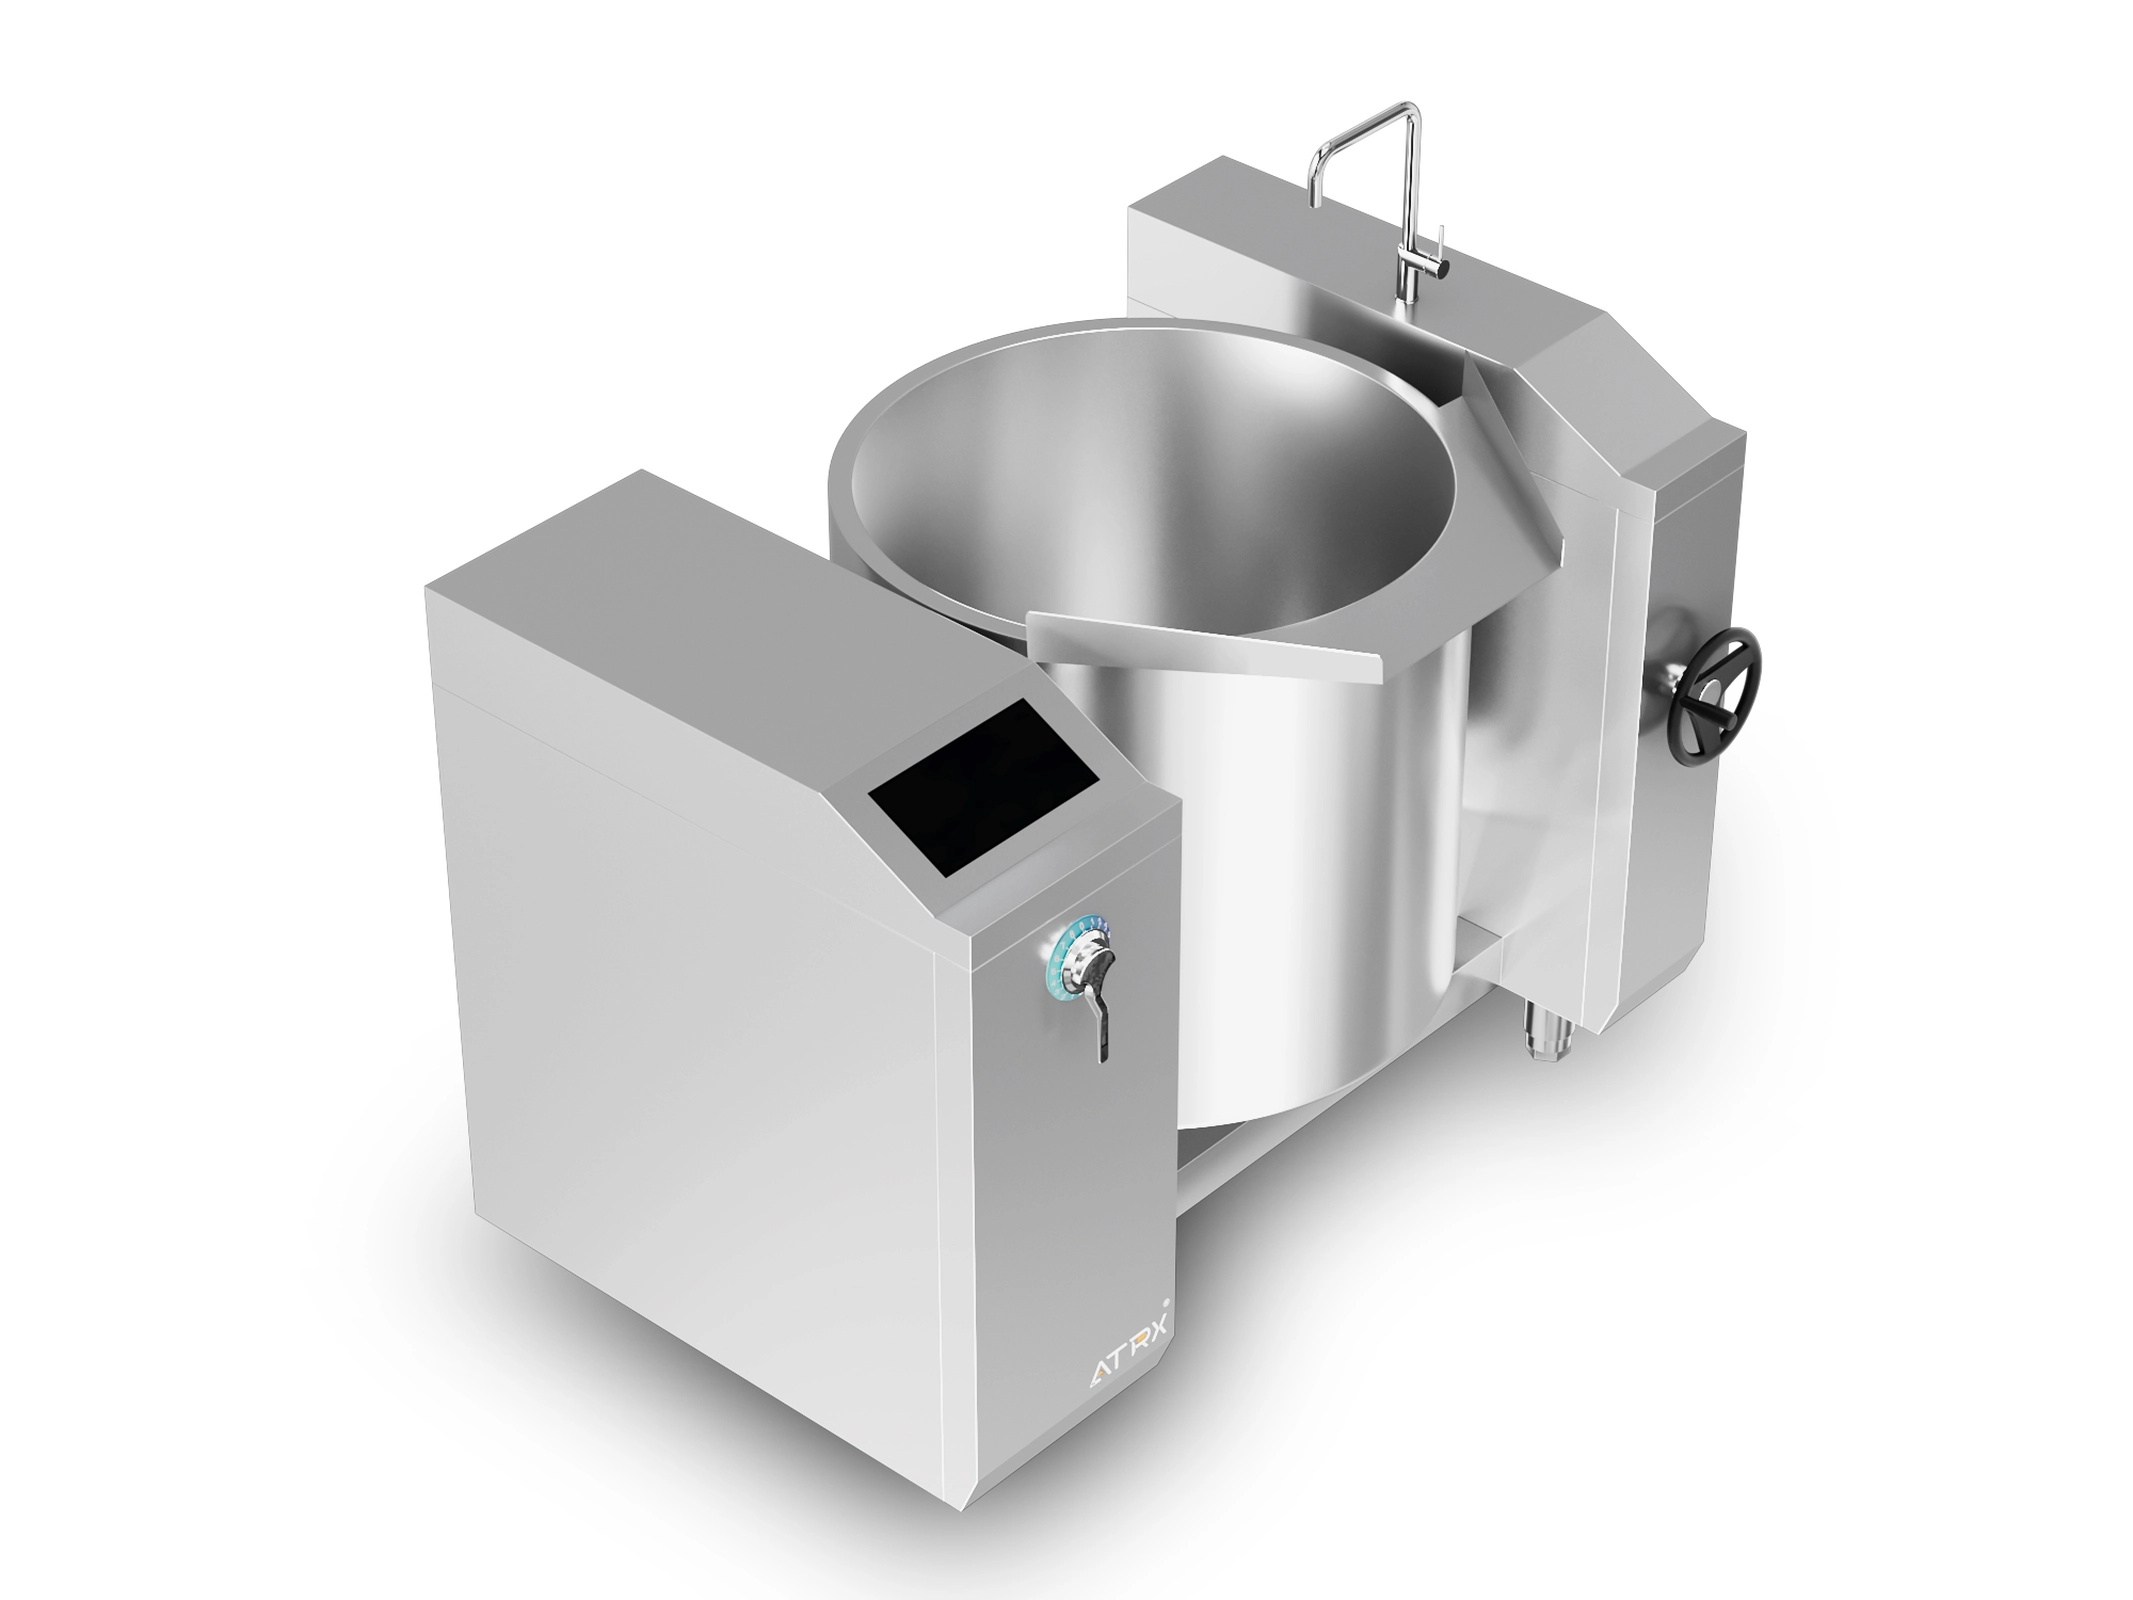
There’s a practical cleaning bonus too. Tilt the pot after service and residual soup, grease, and rinse water drain out by gravity. No reaching elbow-deep into a huge pot to scrub the bottom.
| Comparison | Fixed Soup Cooker | Tilting Soup Cooker |
|---|---|---|
| Pot mobility | None — pot is locked to the frame | Yes — tilts forward via handwheel |
| Primary dispensing | Ladle / bottom drain valve | Full-pot tilt into containers |
| Best-fit scenario | Dine-in, one serving at a time | Central kitchen / cafeteria, full-pot pour |
| Dispensing speed | Slower — good for steady, small-volume supply | Very fast — clears a full pot in minutes |
| Cleaning ease | Requires hand-scrubbing inside the pot | Tilt and drain — significantly easier |
| Scale reference | Single-store dine-in, food stalls, small restaurants | 200L+ batches / centralized distribution |
Short version: serving one bowl at a time → fixed. Pouring out the whole pot at once → tilting. Pair this with your single-vs.-double answer, and the base configuration is locked.
What Parameters Are Easily Overlooked Before Ordering?
When picking an induction stock pot burner for commercial use, most owners zero in on power and price. The “small” parameters that decide whether the equipment can actually run get ignored. Equipment shows up and the power supply doesn’t match, or the unit doesn’t fit, or the materials are wrong — this happens more often than you’d think. This section flags the two parameter categories most likely to bite you, so you can sort them out before the equipment ships.
Electrical Supply and Physical Dimensions — Check These First
Two things need to be done before you pay. Skip either one and you risk equipment arriving at your door with no way to use it. At ATRX, the overseas team now sends every buyer a “site self-inspection checklist” before confirming any order — specifically because these issues come up repeatedly.
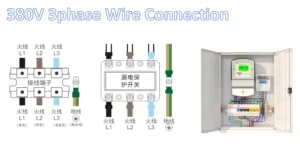
① Confirm your kitchen has three-phase industrial power. The rating plate on any commercial-grade induction soup cooking unit reads 380V / 3Phase. It must connect to three-phase industrial power. Standard residential 220V single-phase can’t drive it. If your kitchen only has single-phase right now, file a three-phase connection application with your local utility and get the rewiring done first. That process can take weeks. Sort it out before the equipment ships — not after.
② Confirm the unit’s dimensions fit your actual kitchen space. Single-head models run about 650mm wide. Double-head, around 1,300mm. Tilting units can hit 1,650mm. But those are body-only measurements. In real placement, you need at least 10–15cm of clearance on every side for ventilation. Pushing a unit flush against a wall chokes airflow, tanks heat dissipation, and can trigger thermal shutdowns.
③ Grab a tape measure and check for real. Go to the kitchen. Measure the actual width and depth available. Compare against the spec sheet line by line. “Looks about right” is how people end up a few centimeters short after delivery — and at that point it’s either a return or a wall renovation. Both cost time and money you don’t need to spend.
Material Grade and Safety Features — Verify Them Yourself
Two more parameters that sales pitches tend to gloss over: material grade and safety protections. Both tie directly to food safety and personal safety. You need your own criteria — a quick “don’t worry, it’s fine” from the seller isn’t enough.
Materials first. The pot body and all food-contact parts on a proper commercial induction stock pot range should be SS304 stainless steel — the recognized food-grade baseline across the industry. SS304 contains 18%–20% chromium and 8%–10.5% nickel. It handles acid, heat, and corrosion well. Years of cooking tomato soup, sauerkraut broth, or vinegar-based stocks won’t cause harmful leaching.
Some budget products quietly swap in 201 stainless steel to cut costs. It looks identical to 304 — you can’t tell them apart by eye. But corrosion resistance is far worse. Long-term contact with acidic ingredients leads to rust and potential heavy-metal leaching. Always ask for a material test certificate or factory inspection report. If it doesn’t say SS304 in writing, don’t take it on faith.
Now safety protections. What should a qualified commercial electric soup cooker actually have built in? The table below lays out the three non-negotiable features. Use it as a checklist when talking to any supplier:
| Protection Feature | Trigger Condition | Protective Action | Risk if Missing |
|---|---|---|---|
| Dry-burn protection | No water in pot / no pot on unit | Automatic power cutoff | Coil damage from dry firing; fire risk in severe cases |
| Overheat protection | Internal temperature rises abnormally | Auto power reduction or shutdown | Electronics burn out, equipment lifespan shortened |
| Overcurrent protection | Current exceeds safe threshold | Automatic circuit disconnect | Short circuit / equipment damage; shock hazard |
These three are the safety floor. In a commercial kitchen — high heat, high humidity, nonstop operation — missing any one of them is a real hazard. Don’t just check the brochure copy. Ask the supplier for photos of the actual protection modules or a test video. Words on a product page aren’t proof. Seeing the hardware is.
After Purchase: Installation and Maintenance Done Right
A lot of owners spend serious time choosing the right commercial induction soup kettle, then hand off installation to whoever’s around and forget about maintenance entirely. Before long the problems start — breaker trips, error codes, slow heating. Most of these aren’t equipment defects. They’re installation mistakes and skipped upkeep. Do the two things below properly and the unit will run trouble-free for years.
Three Things to Get Right During Installation
1. Have a licensed electrician handle the three-phase wiring — and double-check the ground connection. Bad grounding is the number-one post-install headache with commercial induction cooking equipment. The most common symptom: the RCD trips over and over, killing power mid-rush and ruining a whole pot of soup. Worse case, there’s a real shock risk. After wiring, always have the electrician measure grounding resistance with a multimeter. Don’t settle for a visual check.
A restaurant client in Southeast Asia once contacted our after-sales team, convinced the unit was defective because it kept tripping the breaker right after install. Remote video troubleshooting showed the local electrician hadn’t connected the ground wire at all. Once it was properly grounded, the unit ran perfectly — zero trips since.
2. Leave at least 10–15cm of clearance on all sides for ventilation. Whether it’s a compact induction stock pot burner or a large tilting unit, every induction soup cooking machine generates serious heat internally and relies entirely on fans to push it out. Jam the unit against a wall or squeeze it between other equipment and the heat has nowhere to go. Best case: frequent overheat shutdowns. Worst case: fried IGBT modules. Keep the space open, especially on the exhaust side.
3. Run the unit empty for 5–10 minutes on first power-up — an “unboxing health check.” Don’t load a pot right away. Let it idle for a few minutes. Listen for normal fan operation. Check display and button responsiveness. Sniff for anything unusual. If shipping caused any internal looseness or damage, this catches it immediately — before you run a faulty unit into a bigger problem.
One Task per Day, One per Week, One per Month — That’s All It Takes
Routine maintenance on an industrial induction soup pot doesn’t need special skills. One task daily, one weekly, one monthly. That’s the rhythm. Most units that start acting up after a year or two aren’t failing because of build quality. They’re failing because these three small things got skipped.
| Frequency | What to Do | Why It Matters |
|---|---|---|
| Daily | Right after closing, wipe the cooktop and outer pot walls clean with a wrung-out damp cloth — remove all soup stains and grease | Residue left overnight carbonizes into hard scale. It gets harder to clean each day and corrodes the ceramic glass panel, cutting heating efficiency and shortening the unit’s life. |
| Weekly | Check vent openings on the bottom and sides; brush off accumulated grease and dust with a dry cloth or soft brush | Clogged vents are the most common trigger for overheat fault codes. Many owners assume the machine is broken — when it’s really just dirty vents blocking airflow. |
| Monthly | Inspect the power cord and plug for heat discoloration; check connections for looseness. Stop using immediately if anything looks off and call an electrician. | High-power equipment running long hours can loosen connection points, causing localized overheating. Minor cases mean intermittent contact. Severe cases mean burned wiring or fire. |
All three tasks together take a few minutes a day at most — and they prevent the vast majority of avoidable repairs and downtime. The maintenance principle is dead simple: keep it clean, keep it ventilated, keep connections tight. That’s it.
About the author
ATRX Team| 18 Years Commercial
Induction Cooker Manufacturer in China
Induction Cooker Manufacturer in China
Related Posts
Best Commercial Induction Cooktop: Types &Buying Guide
10/09/2026
Commercial Double Hob Induction Cooker | Types, Power, and Installation Guide
10/05/2026
Commercial Induction Cooker 3500W: Model Selection, Commercial Power and Installation
09/29/2026
How to Install a Built-In Induction Cooktop: A Step-by-Step Guide
09/17/2026
How to Clean a Commercial Deep Fryer: A Step-by-Step Guide
09/13/2026
High Quality Commercial Induction Cooker Manufacturer
09/09/2026
Automatic Wok Machine: Types, Specifications, Applications and Buying Guide
08/18/2026
Commercial Induction Range: How to Choose the Right Size, Power, and Configuration for a Commercial Kitchen
08/15/2026
What Is a Commercial Induction Cooker and How Does It Work
08/13/2026
Commercial Induction Range for Hotel Kitchens: How to Choose the Right Model
08/11/2026