What Parts Are Inside a Commercial Induction Cooker? A Full Breakdown
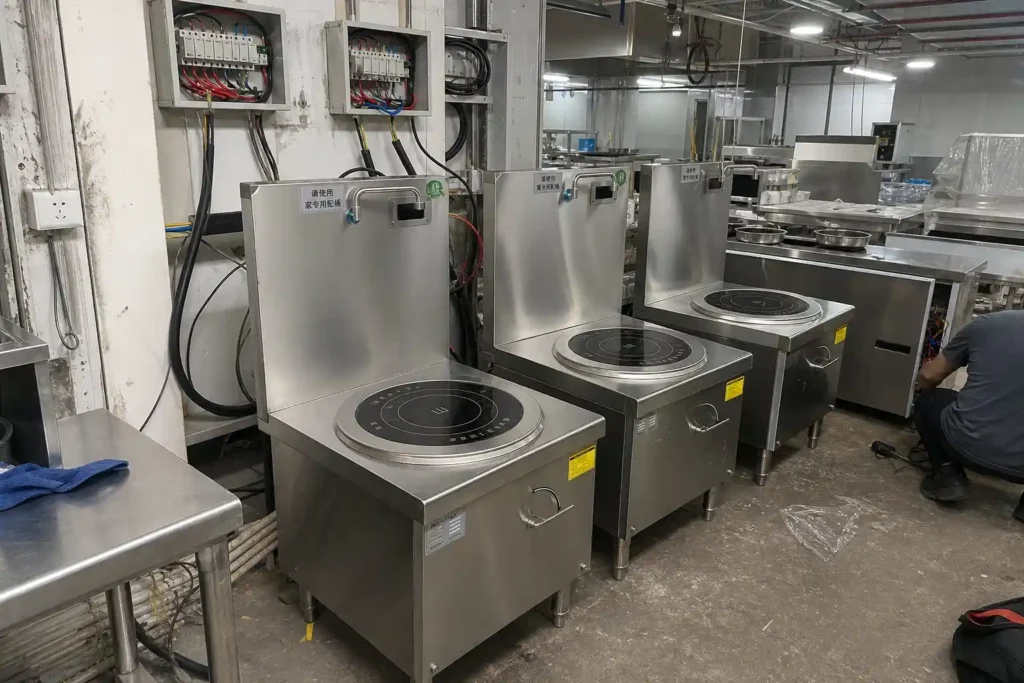
From the outside, a commercial induction cooker is just a metal box. Nothing fancy. But crack it open, and every part inside has a specific job. Remove one, and the whole thing stops working. If you’re a buyer, knowing how these commercial induction cooker components fit together helps you spot the difference between a solid machine and a cheap one — just by reading the quotation.
Inside, the parts split into two groups. One group does the actual heating. The other group keeps the machine alive long enough to be worth the money. Here’s how each one works.
The Three Core Parts That Make Heating Happen — IGBT, Coil, and PCB Board
Heating in an induction cooker follows one fixed path. Electricity enters the machine, passes through three parts, and ends up making the pot hot. Get the sequence straight, and the whole machine makes sense.
IGBT Module — The High-Frequency Switch That Creates Power
Mains power comes in at 50Hz. That’s too slow to generate a useful magnetic field. So the IGBT takes over. It chops that current into high-frequency pulses — 20 to 30kHz — switching on and off tens of thousands of times every second. That’s the only way to get the coil to produce a strong enough alternating magnetic field.
Commercial machines run hard. We’re talking 8kW, 15kW, sometimes 35kW. The IGBT module induction cooker relies on takes massive current stress at these levels. Whose chip is inside, and what voltage it can handle — that decides how long the machine runs before something breaks. At ATRX, we run full-power burn-in tests on every single IGBT before it leaves the line. Why? Because when this part dies, the whole machine goes dead. No backup, no workaround.
Copper Coil Disc — Turns Current into a Magnetic Field
High-frequency current leaves the IGBT and hits the copper coil disc next. The coil energizes and throws off a fast-changing magnetic field above it. That field passes through the glass panel, hits the iron pot bottom, creates eddy currents inside the metal, and those currents generate heat. That’s how the pot gets hot.
Simple principle. Tough execution. Wire thickness, number of turns, spacing between windings — all of it changes the heating result. A Southeast Asian customer once reached out to us about a problem: pot edges burning hot, center barely warm. Our engineers checked remotely and found the induction cooker coil disc from his old supplier had uneven winding gaps. One small production error, and the chef at the other end feels it every time he cooks.
PCB Main Control Board — The Brain Running Everything
What frequency should the IGBT switch at? What power level? Should the machine shut off when it overheats? The PCB control board makes all those calls. It reads sensor data, responds to user controls, and runs every protection routine — overvoltage, overcurrent, overtemperature, dry-burn, short circuit. More than a dozen safety checks, all written into this one board’s program.
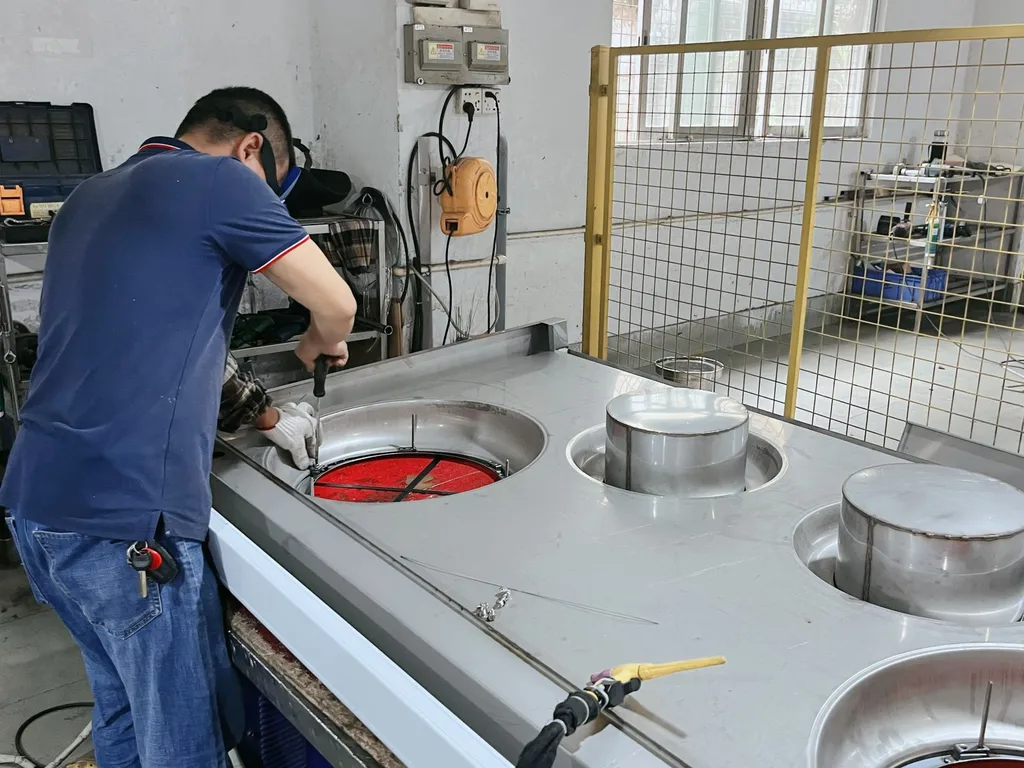
A lot of factories send their PCBs out to third-party SMT shops. We don’t. Design, placement, soldering — all done in our own dust-free workshop. When customers tour our facility, the PCB room is where they stay longest. Everyone gets it: if manufacturing cleanliness drops even a little, cold-solder rates go up, and the mainboard starts failing six months in.
Want the full picture of how a PCB control board gets assembled — from SMT placement through reflow and wave soldering — and how each stage controls quality? We break it all down here: Commercial Induction Cooker PCB Assembly Process.
These three parts — IGBT, coil, control board — are what the industry calls “the heart of the machine.” IGBT converts power. Coil makes the magnetic field. Control board runs the show. They work in series. Break any link and nothing heats up. When you’re sourcing, ask about the brand, specs, and quality control for these three first. That tells you whether the machine has a solid foundation or not.
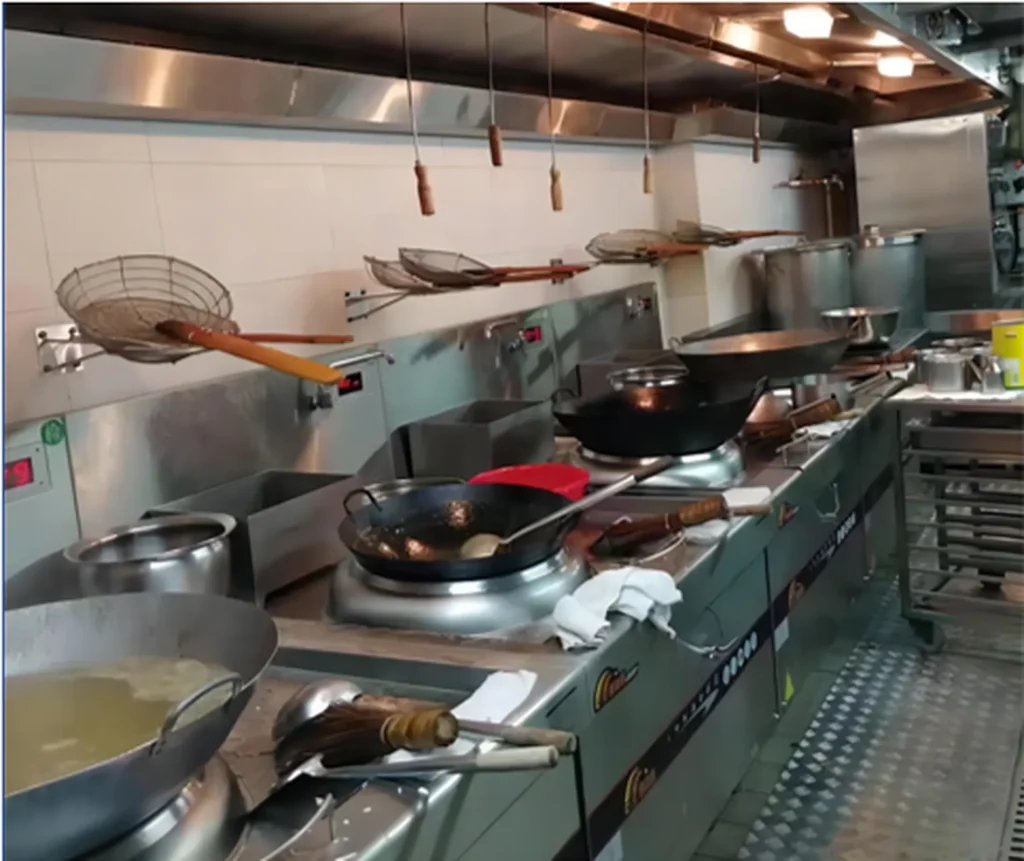
Supporting Parts That Keep the Machine Running — Shell, Glass, Fan, and Display
Core parts decide if the machine can heat. Supporting parts decide something else: can it survive daily punishment in a real commercial kitchen without falling apart? These components don’t produce heat. But let any one of them fail, and the machine is just as dead.
| Component | What It Does | Key Specs | What Happens When It Fails |
|---|---|---|---|
| 304 Stainless Steel Shell | Shields internals from grease, steam, and physical hits | Thickness ≥1.0mm, 304 food-grade, clean welds with no cold joints | Warps or cracks open; moisture gets in; mainboard corrodes; lifespan drops |
| Glass-Ceramic Panel | Lets magnetic field pass through to the pot; carries weight and temperature | Heat resistance ≥700°C, load capacity ≥125kg, near-zero thermal expansion | Cracking = safety hazard; poor transmission = weak heating |
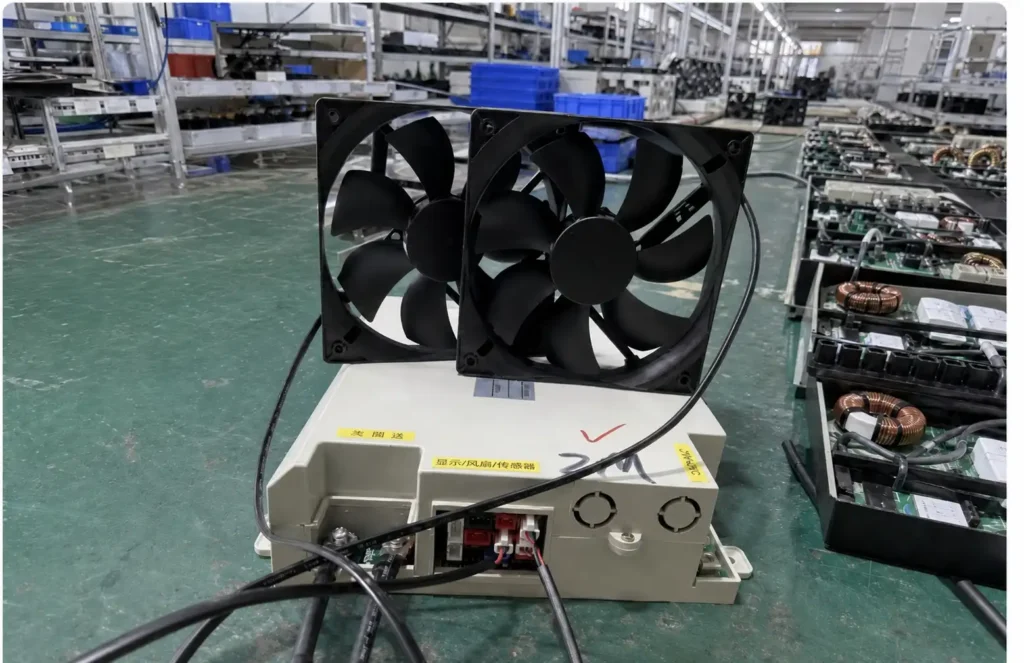
| Cooling Fan + Heat Sink | Keeps IGBT and control board from overheating | Airflow matched to chassis size, bearing life ≥20,000 hours, oil/moisture-proof | Constant thermal shutdowns; worst case: burns out the IGBT entirely |
| Display + Temperature Sensor | Shows status to the user; feeds real-time temp data to the control board | Oil-proof display face, sensor accuracy ±1°C, fast response | Blind operation; protection logic can’t react; faults go unnoticed |
Here’s what our actual repair data shows: about 40% of returned units have nothing wrong with the heating system. The failures come from these “supporting” parts. Fans clogged with kitchen grease. Displays fogged up by oil mist. Enclosure seals that failed, letting humidity reach the mainboard.
Last year an Australian buyer flew to Dongguan for a factory visit. He’d seen our fan and heat-sink assembly in a YouTube teardown video and wanted to verify it in person. His reason? His previous supplier cut corners on exactly these “invisible” parts, and a whole batch placed in open kitchens hit a 15% failure rate in six months.
So don’t just fixate on “Infineon IGBT” or “multi-strand copper coil” when you’re buying. Ask about shell thickness. Panel grade. Whether cooling capacity has enough margin. What the display solution looks like. These should be spelled out in the supplier’s quotation from day one. A genuinely tough commercial induction cooker needs both core and supporting parts at standard. Half-good isn’t good enough.
Why Do the Same Components Cost So Differently? How Part Quality Affects the Whole Machine
Two commercial induction cookers. Both spec sheets say “IGBT module,” “copper coil disc,” “glass-ceramic panel.” The price gap? 30% to 50%. They look the same. Weigh about the same. Same rated power on paper. So where’s the difference? In places you can’t see — component grade, coil material, panel thickness.
Run both machines for 30 minutes and you probably won’t notice anything. But commercial kitchens don’t run 30-minute tests. They run 8 to 12 hours a day at full load. Every day. Over time, that quality gap gets wider and wider until it turns into hard numbers: failure rate, repair bills, total service life.
Two angles explain most of the price gap: core electrical parts and key heating components. Let’s look at both.
Imported vs. Domestic IGBT and PCB — Where the Real Gap Is
1. Conduction Loss Looks Small on Paper — But Time Turns 4% into an 8°C Problem
The IGBT is the power engine. It switches tens of thousands of times per second, converting 50/60Hz grid power into 20–30kHz high-frequency current that drives the coil. High frequency, high current, high temperature — all three hammering one chip simultaneously.
Infineon’s imported IGBT shows about 1.78V conduction drop and 95ns turn-off time. A comparable domestic chip: roughly 1.85V and 110ns. On paper, that’s only a 4%–15% gap. Doesn’t sound like much.
But run both at full power for 30 continuous minutes. The domestic chip’s junction temperature ends up about 8°C higher. Day after day, that 8°C means faster silicon aging and steadily rising failure odds. We ran 12,000-hour comparative lifespan tests at ATRX. Imported IGBT parameter drift stayed within ±1.8%. Some low-cost domestic alternatives drifted past ±3.5%. On the machine level, that drift means power output gets less and less stable — heating becomes unpredictable.
2. When the IGBT Blows Up, It’s Often the Board’s Fault — Not the Chip
People see a blown IGBT and blame the IGBT. Often wrong. The real culprit is the PCB control board behind it. A well-designed board uses multi-layer routing, industrial-grade capacitors, and gate-drive circuits matched to IGBT switching behavior. A cheap board? Two layers, consumer-grade caps, generic drive circuits.
Commercial kitchens are hot and humid. Consumer caps age fast. Solder joints weaken. Once the drive signal distorts, the IGBT can’t fully saturate when it switches on. Partial conduction means a huge voltage drop concentrating heat on one tiny spot in the chip. End result: the module physically ruptures and the mainboard burns through.
A Southeast Asian customer once sent us photos of a mainboard from a low-price unit he’d bought elsewhere. The PCB around the IGBT was blackened and carbonized — after less than 8 months. Teardown showed the IGBT itself wasn’t defective. The drive circuit was the problem. It had been cut so thin that the chip ran in “half-on” state the entire time.
3. “Imported” Doesn’t Automatically Mean Better — Your Usage Intensity Decides the Grade
This isn’t import worship. Domestic IGBTs have gotten much better in recent years. Packaging consistency and mid-to-low power stability have improved meaningfully. Under 3.5kW, a few hours a day? Domestic is fine — better value, actually.
But above 8kW, running 10+ hours daily? Different story. Imported chips can deliver MTBF over 30,000 hours. Lower-grade options might manage 5,000 to 8,000. The real math isn’t “how much more does one chip cost.” It’s: how long does one breakdown shut the kitchen down? What’s the lost revenue? What does a technician call-out cost? What about the customer complaints nobody invoices for? Add all of that up, and the few dollars saved on a cheaper chip don’t come close to covering it.
Copper Coil vs. Aluminum Coil, Panel Thickness Differences — Impact on Heating and Durability
Coil discs and glass-ceramic panels have one thing in common: you can’t tell good from bad by looking. Open the box and you’ll always see a black panel and a neatly wound coil. But these two “invisible” parts account for 30%–50% of the total machine price gap.
Coil disc first. Pure copper versus copper-clad aluminum — the gap is at the material level. Pure oxygen-free copper: resistivity 1.72×10⁻⁸Ω·m, thermal conductivity 401W/(m·K). Copper-clad aluminum: thin copper skin (0.1–0.3mm) wrapped around an aluminum core. Aluminum’s resistivity is 2.82×10⁻⁸Ω·m. Overall conductivity is about 25% worse than solid copper.
What does 25% worse conductivity mean in practice? At the same power output, the copper-clad coil eats more energy as waste heat inside itself. Measured: after one hour of continuous operation, copper-clad aluminum runs about 20°C hotter than pure copper.
The bigger issue is long-term decay. Pure copper resists oxidation — good for 10+ years in commercial use. Copper-clad aluminum has a copper-aluminum boundary that corrodes electrochemically, year after year. We’ve torn apart 3-year-old copper-clad coils. The oxide layer at the interface had grown to 3× its original thickness. Heating efficiency had dropped about 12%. Same machine, same pot of water, but now it takes a full minute longer to boil. Your electricity bill notices even if you don’t.
For a deeper dive on coil disc materials, winding methods, and how to choose the right spec for different power ranges — from wire gauge to turn count — see our detailed guide: Commercial Induction Cooker Coil Disc Selection Guide.
Now, the glass-ceramic panel. 4mm versus 6mm. Just 2mm of difference. But the performance gap is a step change. A 6mm panel handles static loads over 120kg — a fully loaded commercial soup barrel. A 4mm panel under the same weight accumulates bending stress over time and will eventually crack.
Thermal shock is where things really split. A quality 6mm panel has near-zero thermal expansion. Heat it to 700°C, pour cold water on it — no crack. What happens in a real commercial kitchen every single day? Soup boils over. Cold water splashes onto a scorching panel. That’s not an accident. That’s Tuesday.
Last month a European buyer came for a factory audit. He’d seen our panel thermal shock test on YouTube and asked us to repeat it live. We ran the panel at full power, then poured cold water directly on it. No damage. He’d brought a 4mm low-cost sample with him. Same test. Second pour — visible radial cracks appeared. You could feel them with your fingertip.
Here’s a side-by-side comparison to help you quickly gauge what grade your quotation actually corresponds to:
| Comparison Item | High-End Solution | Low-End Solution | Where the Gap Shows |
|---|---|---|---|
| Coil Material | Pure copper (oxygen-free copper) | Copper-clad aluminum (copper skin + aluminum core) | 25% lower conductivity, 20°C hotter, 3–5 years shorter life |
| Coil Service Life | 10+ years | 5–7 years | Full coil disc replacement needed mid-life; not cheap |
| Panel Thickness | 6mm | 4mm | Load capacity gap over 70kg; bending strength exponentially different |
| Thermal Shock Resistance | No cracking at 700°C rapid cooling | Limited shock cycles before failure | Micro-crack risk climbs sharply after 1–2 years on low-end panels |
| Panel Magnetic Permeability | High (minimal energy lost in the panel) | Average (panel absorbs some heat itself) | Directly affects heating speed and energy efficiency |
None of this shows up on a quotation sheet. But it’s all inside the machine. A low price isn’t an advantage if the parts behind it can’t survive your actual workload and expected lifespan.
How Can Buyers Tell a Real Manufacturer from an Assembler by Looking at Components?
The gap between a real manufacturer and a pure assembler never shows up in a company profile. But the commercial induction cooker components inside tell the whole story.
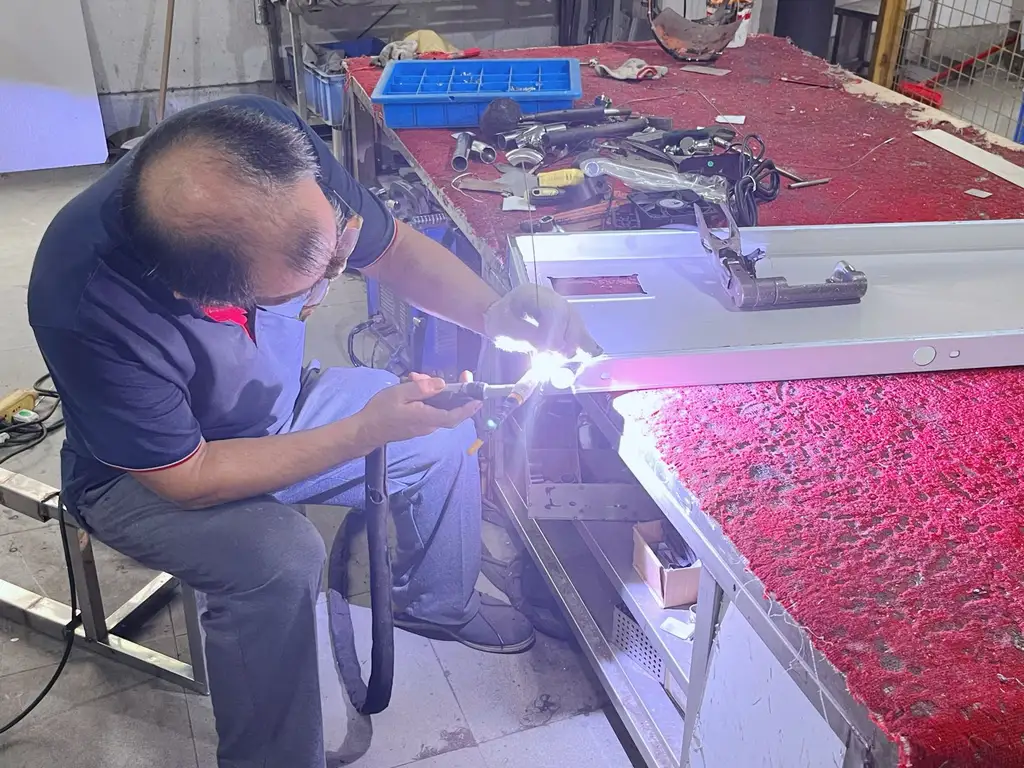
An assembler’s playbook is simple. Buy a generic core module. Buy a standard coil disc. Fit a shell. Stick a label on it. Ship. A real manufacturer designs the control board in-house, picks and tunes the IGBT drive solution, and winds the coil disc on their own equipment. Every step has a reason behind it and a quality standard attached.
You don’t need to be an engineer to tell the difference. Ask the right questions, and the supplier’s answers do the judging for you.
When overseas buyers visit our ATRX factory, we see the same pattern every time. Experienced purchasers don’t start by checking how big the production floor is. They walk straight to the SMT line and the coil winding station. First question, almost word-for-word: “This control board — did you make it, or buy it?” That answer usually decides whether the conversation goes any further.
Ask These Component Questions and You’ll Know If They Really Make It or Just Assemble
Here are five questions you can use directly when talking to any supplier — on WhatsApp, on a video call, or face-to-face at a trade show. After this round, you’ll know whether they actually manufacture or just snap parts together.
1. IGBT Module — Who Developed It?
Ask straight: “Is your IGBT module and drive circuit developed in-house, or did you buy a ready-made core solution?”
A real manufacturer answers with specifics. Which Infineon model. What rated current. Why that chip was picked for this power range instead of another. An assembler gives you one line: “We use imported IGBT.” Ask a follow-up and they stall.
2. Coil Disc — Made Here or Bought Outside?
Follow up: “Is the coil disc wound in your own factory, or purchased as a finished part?”
A manufacturer with real capability designs the turns, wire gauge, and disc layout for each power range. Ask to see the equipment — they’ll walk you to the workshop. Ask for semi-finished samples — they’re sitting at the workstation. An assembler can’t answer basic coil specs because that work doesn’t happen in their building.
3. Incoming Inspection — Do They Actually Check Parts?
Ask: “Do you run IQC incoming inspection on critical components? Can you trace material batches?”
This one separates the two types fast. Real manufacturers pull out IQC reports and supplier files on the spot. Assemblers draw a blank here. Makes sense — they receive pre-assembled modules and never test individual parts.
4. Protection Logic — Default Settings or Custom Calibration?
Ask: “Over-temperature, overcurrent, surge protection — how did you set those trigger thresholds? Factory defaults, or calibrated specifically for this model?”
A manufacturer’s protection values come from testing. Lots of it. They can explain what conditions they tested under and why they adjusted specific numbers. Assemblers ship with whatever the solution provider pre-loaded. Never touched it. One is precision-calibrated. The other is install-and-forget.
5. Burn-In Testing — How Long, How Hard?
Last question: “What’s your pre-shipment burn-in test? How long does it run, and at what load?”
A manufacturer has a clear answer. Something like: 4+ hours at continuous full power, logging power curves and temperature data throughout. An assembler? They power it on, check if the screen lights up, and box it.
These five questions work as a quick-filter toolkit — a practical commercial induction cooker buyer guide in five steps. More detail in the answers means a more complete manufacturing chain behind the product. Vague or evasive responses? Draw your own conclusions about what quality and after-sales will look like down the road.
Self-Developed Modular Design vs. Generic Off-the-Shelf Cores — What It Tells You About the Factory
Want to know if a factory really manufactures? Look at one thing: did they develop the core parts themselves, or buy them ready-made?
A factory with genuine commercial induction cooker manufacturing capability designs its own control board architecture, IGBT drive topology, and coil disc specs — all tailored to a specific model’s power range, usage environment, and thermal design. Parts aren’t just stuck together. They’ve been through repeated joint debugging and extended burn-in runs.
When we develop a new model internally, just the control board-to-IGBT matching stage takes at least three rounds of thermal cycling. Each round runs non-stop for 72+ hours minimum. Data has to pass before production parameters get locked. Anything shorter won’t cut it — these machines face 10+ hours of continuous operation in real restaurant kitchens, every single day.
For the full picture of what a commercial induction cooker goes through from loose parts to boxed product — every stage, every quality checkpoint — see our detailed breakdown: Commercial Induction Cooker Manufacturing Process.
Assembly-type factories work differently. Buy a standard control board and drive module from a solution provider. Pair with outsourced coil discs and shells. Put it together. Ship. It’s fast. But problems hide inside: generic cores use protection settings built for the “lowest common denominator.” They’re not tuned for your machine’s specific thermal layout or real-world conditions.
Where does this show up? Two hours into continuous full-load operation, power starts drifting. Temp control gets sloppy. Protection trips for no clear reason. The stove shuts down mid-service. Chef’s angry. Lunch rush orders stack up with nowhere to go. That’s exactly the moment generic solutions crack first.
This table breaks down the core differences between the two factory types:
| Comparison Dimension | Self-Developed Modular Design (Real Manufacturer) | Generic Core Assembly (Assembler) |
|---|---|---|
| Control Board Development | Self-designed circuits; protection logic and power curves built for each model | Bought from solution provider; ships with factory default parameters untouched |
| IGBT Drive Solution | Model hand-picked; drive circuit adapted and validated through thermal cycling | Comes bundled with the generic core; no targeted matching done |
| Coil Disc Specifications | Turns and wire gauge designed per power range and cookware type | Off-the-shelf standard disc; one size forced into multiple models |
| Part-to-Part Matching | Multiple joint-debug rounds + burn-in testing; parameters locked together | Parts sourced separately, assembled together; no system-level verification |
| Long-Term Full-Load Performance | Stable power, precise protection, low failure rate | Power drift, false shutdowns, thermal bottlenecks common |
| Customization Flexibility | Can adjust power range, connectors, appearance per customer needs | Locked into the generic solution; very little room to change |
Here’s the one-line test: if a factory can clearly explain what percentage of core parts they developed themselves, the design reasoning, and how they verified everything works together — that’s real manufacturing. If all they say is “brand-name parts” and “proven solution” — they’re an assembler using fancier language.
We once hosted an overseas YouTuber shooting a factory walkthrough. Afterward, he said the most memorable part wasn’t the production line’s length. It was watching an engineer pick up a control board and explain, component by component, exactly why each one was chosen. That’s what manufacturing capability actually looks like when you see it up close.
Common Questions People Ask
Q1: The quotation lists two IGBT brands as options. How do I choose?
Don’t stop at brand names. Ask three things: Does the rated current give at least 1.3× headroom above your max power need? How many units has the supplier actually shipped with that specific model? Can they show you a burn-in test report for it?
High installed volume means a proven, stable supply chain. Tight headroom means the chip runs near its limit every day — that accelerates wear. Same brand, different model number can mean a 40%+ performance gap.
Q2: Supplier says the panel is “imported glass-ceramic” but won’t name the brand. Normal?
Not normal. Factories that genuinely use imported panels have no reason to hide it. The supplier pool is small — France’s Eurokera, Japan’s NEG, Germany’s Schott. Brand names and thicknesses are verifiable. If someone just says “imported” and dodges when you ask for a certificate or origin, you’re likely looking at a domestic panel wearing an “imported” label. Ask for the raw material purchase record. That settles it.
Q3: Budget is tight. What can I downgrade, and what should I never cut?
Never cut the IGBT module or control board. These two own the machine’s safety and core lifespan. Downgrading them means accepting shutdown risk and potential burnout. Coil disc material on 8kW+ models shouldn’t be compromised either.
Where you can flex: cosmetics and interface. Shell can go from 1.2mm to 1.0mm. Display can swap from LCD touchscreen to a simpler digital tube. Controls can use knobs instead of touch panels. None of that hurts core performance, and it frees up 10%–15% of cost to spend where it actually matters — on the electrical components that keep the machine running.
